The 2026 Sidecar Rally registration is now open! Click here: USCA 2026 Rally Registration Form
@scott-h Had not seen that. Good for them. I felt like their connection to the steering head tube left a little to be desired, but hey, what do I know?
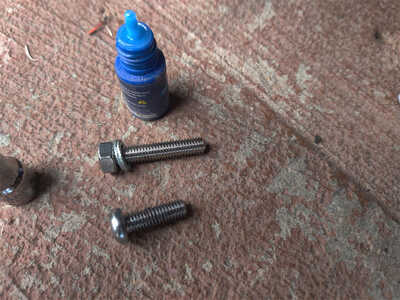
As silly and simple as it seems, so far the footpeg studs replacing the pan head bolts, is my favorite part of the bracket work. Came out clean, and absolutely increased the clamping force. The two piece anti-vibration (a-v) washers should help maintain that clamping force. 😎
These are stainless grub screws, along with stainless nuts, and zinc coated a-v washers. Used a bit of semi-permanent thread locking compound to hold the studs in place.
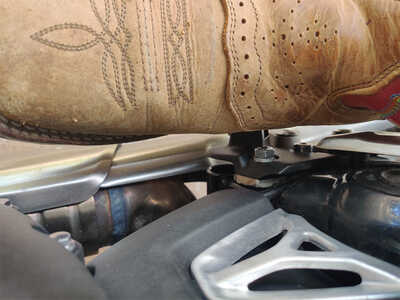
Plenty of clearance between the nuts and the boot, even when scooted in further than normal.
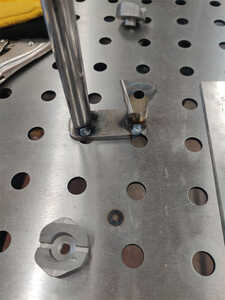
Back working on the upper front bracket, the left plate that ties the mount block to the cross tube was fabricated, and the pieces were tack welded to get the correct positioning. Other than finishing the welding of the left side block to both plates, and drilling the hole in the outer plate to fit the cap head bolt, that is all that was accomplished on the project today.
Hold my keyboard and watch this! 🙃
Putzing around the garage today. Started looking towards creating the front lower mount. In my subjective opinion, this is the most critical mount on the rig. Couple of reasons for this:
- Applied force at this point from the sidecar.
- Strength of the bike's mounting point without a cradle type frame.
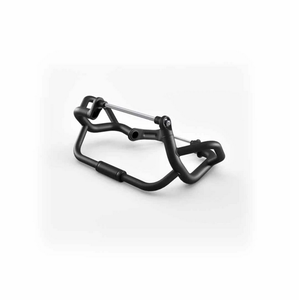
With those two things in mind, I decided to utilize Triumph's lower crash bar kit as a mounting point. The hope is that Triumph engineering designed the crash bar kit to deflect/bend before it damages the mounting points on the engine and frame. It uses the engine/frame mounting point on both sides, as well as a cast boss that goes across the bottom of the engine case tying those to sides together. The kit is pretty stout. I've reefed on it with substantial force without creating deflection (the whole bike moved).
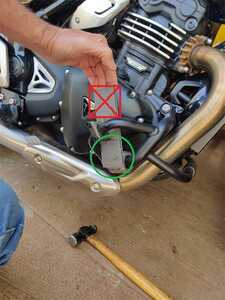
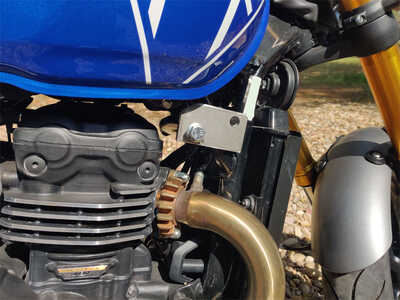
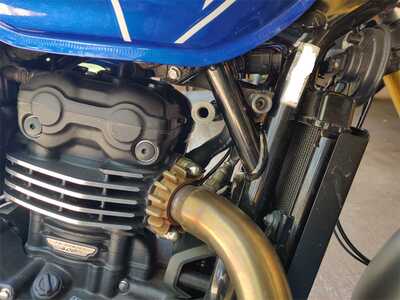
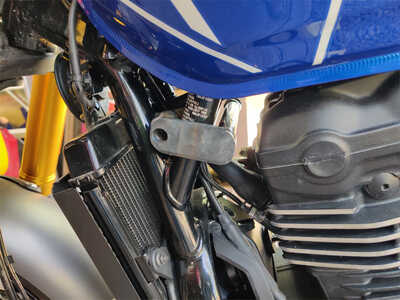
Steel plate gets welded to the two tube clamps. Red square with "X" is steel that won't be there. Green circle is where the front lower sidecar mount will attach. Lower tube clamp will have the bolts facing in towards the bike. Since this bracket also stays on the bike with or w/o the sidecar, I'll make a rounded top plate covering the square clamp to clean up the looks, and keep me from cutting my shin when walking by the bike.
This creates a mounting surface that is in close alignment with the longitudinal, and lateral axes of the bike. Will be a big help with the Rock Jock mounts that are being used.
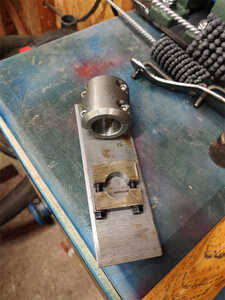
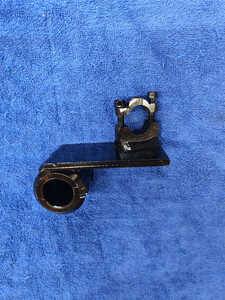
Pieces that will all get welded up to create the bike side bracket. The tube clamp has to be honed to fit the crashbar tube. The square clamp was fabricated from some 1.5"x1.5" bar stock.
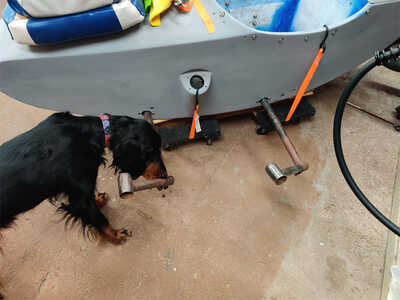
Shop Forepup inspecting the sidecar frame, and wondering why I haven't cleaned up the rust. 😯
Hold my keyboard and watch this! 🙃
Crash bars are usually fairly thin wall tube.
That just means caution required when fitting.
I cannot see all its fixing points so hard to armchair critique.
What you've done so far seems great though so the benefit of the doubt here.
Will it be securely tied to both side of the engine?
I:E clamp the engine in effect?
I'll drink my coffee now then go and try doing something useful.
![]()
Posted by: @brstrCrash bars are usually fairly thin wall tube.
That just means caution required when fitting.
I cannot see all its fixing points so hard to armchair critique.
What you've done so far seems great though so the benefit of the doubt here.
Will it be securely tied to both side of the engine?
I:E clamp the engine in effect?
I'll drink my coffee now then go and try doing something useful.

Great questions! 👍 You are correct on all accounts, as usual.
- Tubing & brackets appear to all be 4mm wall, hence the need to hone the big clamp. It now clamps tight without deforming the tube.
- Upper clamp is to keep bottom clamp from rotating due to the load of the sidecar. It does not require much clamping force.
- The crash bar upper mounting points are the bottom frame to engine mounting point (both sides). Boss cast into the engine case goes all the way across. Frame and now crash bar assembly clamps the whole thing tight with a 12mm bolt.
- Lower crash bar mounting point is another boss that runs all the way across the engine case towards the bottom rear. This boss is used to secure the skid plate (400X), and exhaust system. Crash bar mounts to both sides clamping the crash bar and exhaust to the engine with a 10mm bolt.
Hold my keyboard and watch this! 🙃
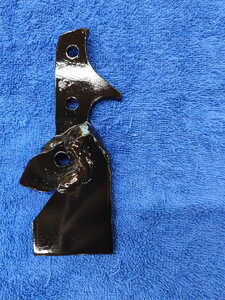
Front upper bracket assembly is together. Getting the plate lined up just right to drill/weld was quite the project. Three times tack welding to the mounting block in order to get the positioning right. I am getting better at making small tack welds though. lol
The end of the pipe has a 12mm-1.25 flange head nut welded on. The fine threads will help with clamping force and the flange distributes the load over more area.
Left side plate is welded to the mounting block, and the pipe.
Hot cutting oil and melted metal. The garage is starting to smell good. 😎
Hold my keyboard and watch this! 🙃
Along with this being the 100th Birthday of B.B. King, today was "melting metal day", and bracket painting day. Unfortunately it wasn't "taking pictures day." Not sure what happened there. 🤔
Anyway, by tomorrow C.O.B. the bike side brackets should be pretty much done, with the exception of drilling a few holes to mate with the sidecar mounting brackets. Will make sure to have pictures tomorrow.
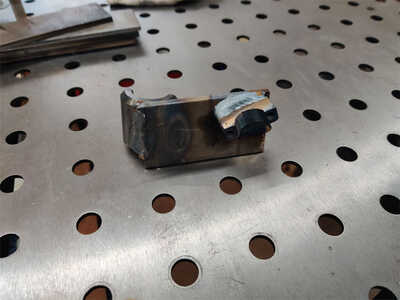
I did manage to take one picture of the lower front bracket assembly welded up. Definitely cranked up the welder for this one. 😀 The bracket took multiple tries to get all the angles correct as well. Did not leave room in the design for any misalignment. It will get cleaned up and painted tomorrow. It will be a bit of a bear to get bolted up on the bike. Considering either removing the exhaust header pipe, or the crash bar (whichever is easiest).
Hold my keyboard and watch this! 🙃
No pics?
Hard to get good help EH!
Had to look Riley up.
Woo Hoo! Picture day! 🤩
🤣
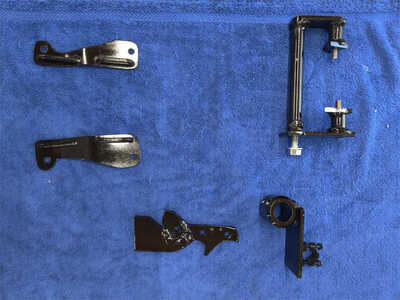
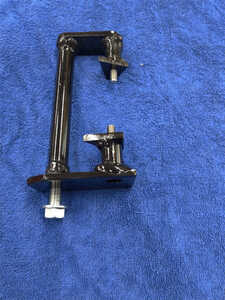
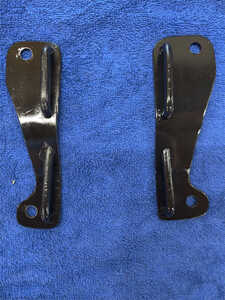
Okay, the bike brackets are done for now (dfn).
Upper right brackets will need holes drilled to mount the sidecar brackets. But not sure what I'm going to do for upper struts yet.
Lower brackets I'm strongly considering welding the mounting tabs directly to these bike brackets.
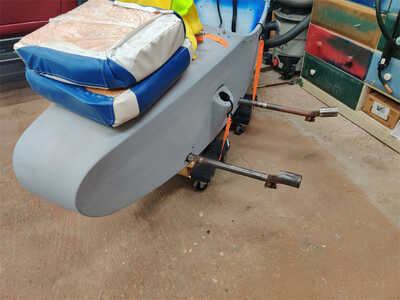
Tomorrow starts work on reconditioning the sidecar brackets. If I understand correctly this sidecar set unused for about nine years near the coast. Inside of the frame tubes are rusted. The extension tubes no longer fit inside. Will remove them from the sidecar and use a ball hone with a vinegar solution to clean them up. The extension tubes need a good wet sanding (with probably the same vinegar solution). By the time they are usable, I should be pretty pickled.
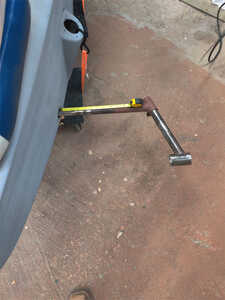
About the end of the tape measure is close to the total width between the bike and sidecar. The tubes need to go in a long way to make that happen.
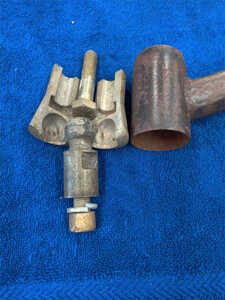
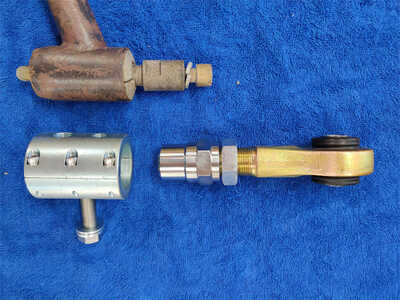
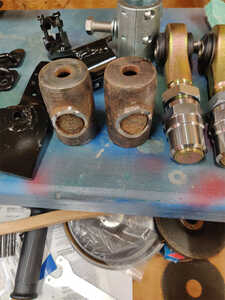
Currently the sidecar is setup to use these ball style joints on the lower mounts. Only one came with the sidecar, and I'm not excited to use it.
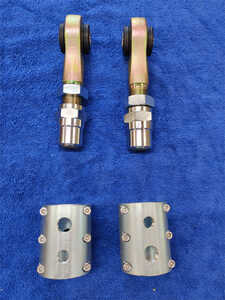
The cups will get cut off the tubing and these new clamps will be welded in place. Have some DOM tubing coming next week that fits in the clamps and the new Rock Jock lugs weld into.
Comparison between OEM, and the Rock Jock setup. Found out these new Rock Jock joints have up to 15 degrees misalignment, which if I do the job right will be more than enough.
That's it for today.
Hold my keyboard and watch this! 🙃
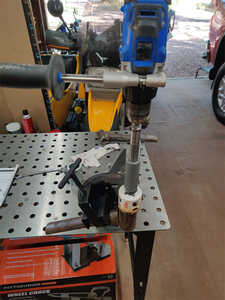
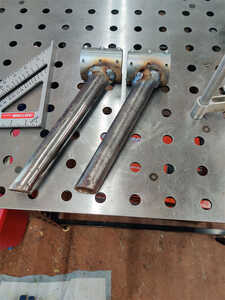
Went out this morning and bought an inexpensive tubing notcher. Never had one before. Always did the "notching" with a grinder. Boy does this make life easy.
Cut off the old cups, cleaned the inside of the pipes with a round file to get rid of the excess rust scale, and welded on the new clamps.
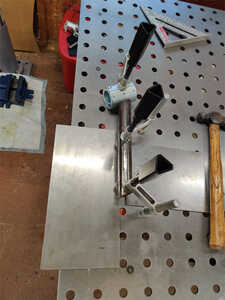
This setup table is a bit slow to use, but it sure makes getting things aligned correctly a breeze. Both pipes came out just the way they should have.
That's all the time available until next week.
Hold my keyboard and watch this! 🙃
Hey Scott, which notcher is that; how much is "inexpensive?" 🤑
Hi Dane,
I picked up this one Generic Tube Notcher for $60 from Harbor Freight. They probably go on sale, like everything else. I literally woke up thinking life would be easy with a notcher. lol All the tube chassis & suspension stuff done over a couple of decades, and now I get a tool to dp what can be done in about 10 minutes with a cutting blade on a grinder. 🤣
But it is like hitting the easy button. 😎
Hold my keyboard and watch this! 🙃
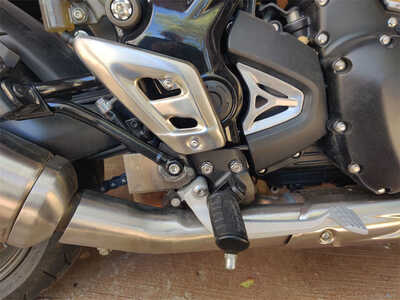
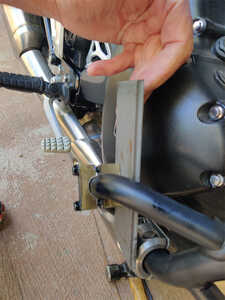
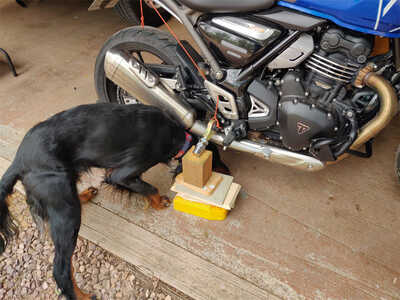
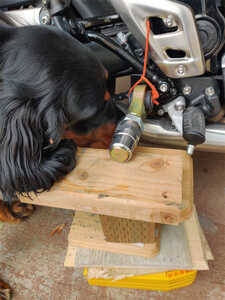
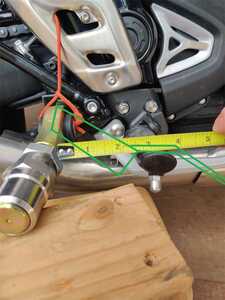
Had a bit of time to get an idea of how the flex joints will mount up to the bike. Most concerning is the rear mount. It is very tight to the peg. The Shop Forepup had to check ground clearance, and get a closeup of the exhaust clearance.
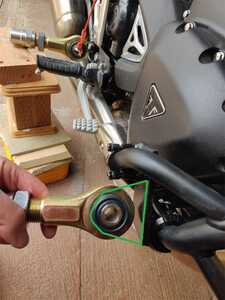
Of concern to me was clearance for the rider's boot heel. It is tight. Thankfully this bike has "sport bike" ergonomics where the foot angles up towards the heel (Green drawing). The flex joint is pretty much parallel to the rider's peg.
Front mount has plenty of room. Back to thinking a separate mounting plate for this joint which bolts to the bike bracket would be best. Otherwise the eye plates would stick out quite a bit when the sidecar is detached.
Hold my keyboard and watch this! 🙃
@scott-h I bought similar a few years back and Luke (FR700) pointed out the simple way of doing the same cuts with a small grinder.
Still it will get you where you want to go.
The holes saws do tend to pull to one side unless everything is clamped tight and the holes saw is sharp.
Might get to try similar on my minimill soon.
I've done a lot of notching with just a 4-1/2" hand grinder. Worked fine, but if I'd been willing to let a few moths out of the wallet, and realized how easy this tool makes things....
Picked up a Milwaukee Hole Dozer Bi Metal hole saw kit when it was on sale at our local hardware store. Have added a whole bunch of other sizes while working on this old broke down farm hobble. Hands down the best set I've had.
An old master machinist I met suggested using this inexpensive thread cutting oil on metal, and they chew right through. I use that oil in a cheap squirt bottle for drilling, threading, etc.. Smells great when it's smoking hot. 😎
When I get a good deal on something that works great, it puts a perma-grin on this old face. 😊
Hold my keyboard and watch this! 🙃
- 29 Forums
- 11.8 K Topics
- 93.3 K Posts
- 1 Online
- 5,604 Members
