The 2026 Sidecar Rally registration is now open! Click here: USCA 2026 Rally Registration Form
Apparently, other that classes in CAD, you also need a class in reading forum posts ![]()
I was not suggesting that you take a class on CAD.......I was suggesting that you find a class or program that will accept your crayon drawings, and.....the students in the class or program do the work for you, produce the finished products, then hand the finished items to your crayon stained hands.
Ya welder ![]()
Two Million Mile Rider
Exploring the World in Comfort
Posted by: @miles-ladueApparently, other that classes in CAD, you also need a class in reading forum posts

I was not suggesting that you take a class on CAD.......I was suggesting that you find a class or program that will accept your crayon drawings, and.....the students in the class or program do the work for you, produce the finished products, then hand the finished items to your crayon stained hands.
Ya welder

FIFY
Illegitemi non carborundum est!
That video was very informative.
Cad was something I attempted years ago but never prevailed in.
Seemed to find sticking points that stumped me without finding work arounds.
Got busy in true 3D and time went by.
The internet now is perhaps more? Informative?
Will watch how you get on here.
Posted by: @thane-lewisPosted by: @miles-ladueApparently, other that classes in CAD, you also need a class in reading forum posts

I was not suggesting that you take a class on CAD.......I was suggesting that you find a class or program that will accept your crayon drawings, and.....the students in the class or program do the work for you, produce the finished products, then hand the finished items to your crayon stained hands.
Ya Wanna-Be welder

FIFY
FIFY 😉
😆
The drawings would need to be pretty accurate for a college student to competently recreate with CAD, as they don't yet have the hands on experience to confidently fill in the blanks. So if I'm going that far, using the design services of SendCutSend would most likely provide a better/faster result.
There are a few simple brackets for Speedy that should be a good start to learning the CAD. Will take the laptop into the garage this afternoon and get started.
Hold my keyboard and watch this! 🙃
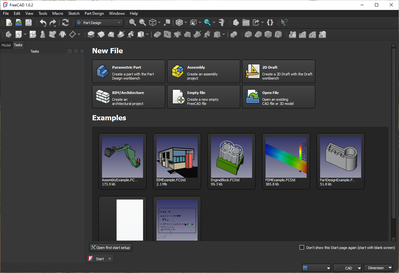
slight change of plans. Went to sign up for the Onshape free program, and they wanted my phone number. All ready get enough spam calls. So I downloaded Free CAD. Big download went quick. Easy to install with no personal info required.
Noticed on the main page it can also do 2D drafting. Used to be pretty competent at that. So there is a sliver of hope. 😎
Hold my keyboard and watch this! 🙃
Step one: Simple mounting blocks at the upper front frame point.
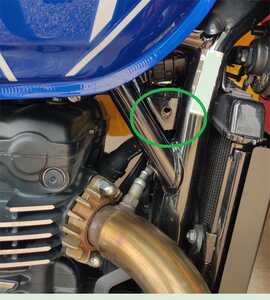
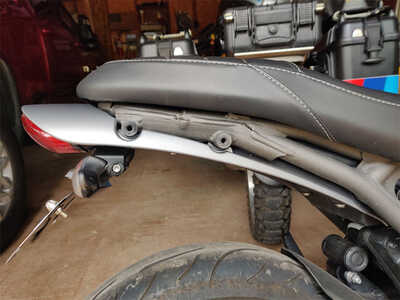
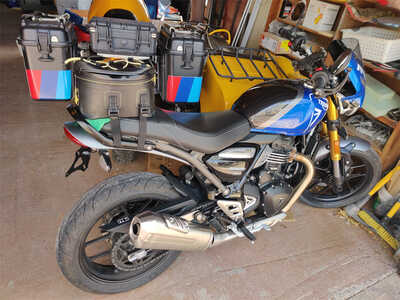
Triumph included these two mounting points (one on each side of the frame) as the top mount for their upper crash bar option. The plan is to tie these points together with a plate and tube to limit stress at the steer head. In order to do that it will need blocks to fill those areas (area in green circle below).
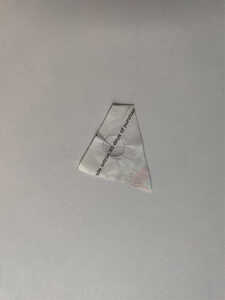
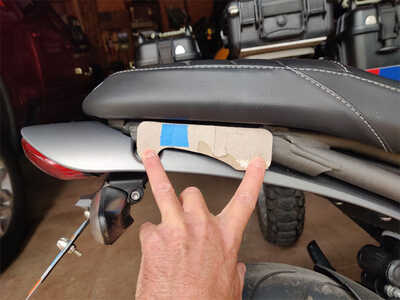
Using a rare and specialized parchment (receipt from Ace Hardware) to create a thin-layer template this was created.
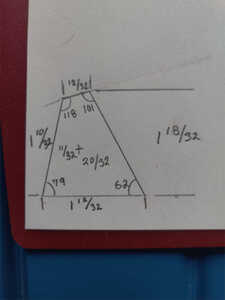
Then a rough working drawing was made to get the measurements.
Then it was on to transferring this all to Freecad. Using the line tool it was looking great, until the "save" function was chosen, where I learned that was the wrong way to do this sketch. I was supposed to use the Polygon tool. Now I get to figure out how to do that. lol Today's chore, after Miss Miles and I go for a hike.
If CAD teaches anything it is the importance of perspective. 😎
Hold my keyboard and watch this! 🙃
Tried the Polywolly Doodle All The Day tool (aka Polygon tool), and yeah, I might have well been whistling Dixie. Think I need the Fisher Price CAD program for 2-4 year olds.
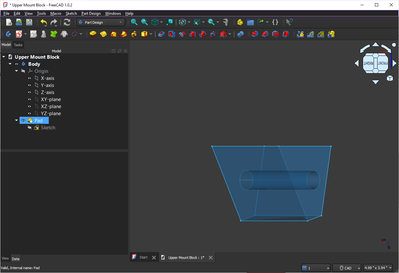
There might be success using the line tool after all. Drew up three sides by length and angle, then just connected the last two open dots. Added a circle, and this is what it looks like. Ordering this 3D printed in plastic to make sure it actually works, may be the smart move here.
Hold my keyboard and watch this! 🙃
Meanwhile back in the caveman workshop, it was time to get back to the basics. Cardboard Aided Design (CbAD) for the upper rear strut mount.
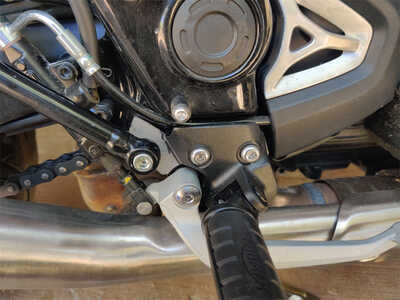
These are the threaded lugs for the grab rail. Pretty beefy area of rear subframe. I'll use studs with medium strength thread locking compound, because I don't trust the strength of the threads on those lugs.
Template for sidecar bracket. This will also have a mirror image bracket for the left side of the bike. I can weld a couple of bag mounting loops from 1/4" rod to run the tail bag. These brackets can be made here in the garage pretty easy. The clevis link will be welded towards the front of the bracket.
Hold my keyboard and watch this! 🙃
Finally finished a drawing for SendCutSend. Pricing to have the spacers made $197 and change each. They can only do it in aluminum, and that doesn't work for this project. Could use an off shore CNC facility, but... no thanks.
Plan B. Create my own, cave man style. About $200 in steel and consumables will do all the brackets for the bike. Changes things up a bit, but more opportunities to cut, weld, drill & tap steel. I can already smell the fresh scent of hot cutting oil and melted metal. 😍
Hold my keyboard and watch this! 🙃
@scott-h Well, it is always amazing to build up a shape out of flat-stock, if needed! Worse ways to spend an afternoon exist.
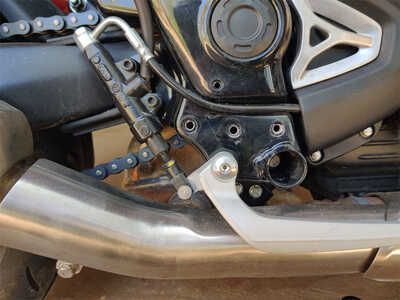
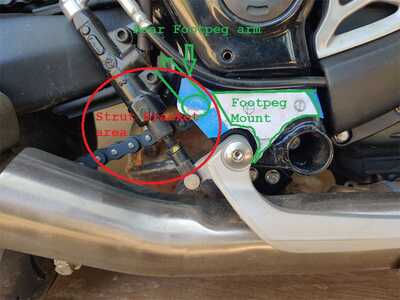
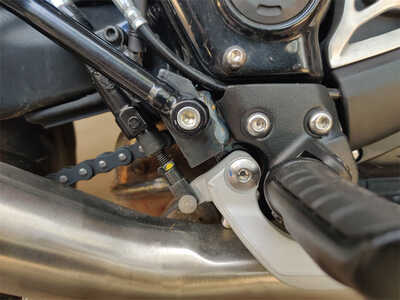
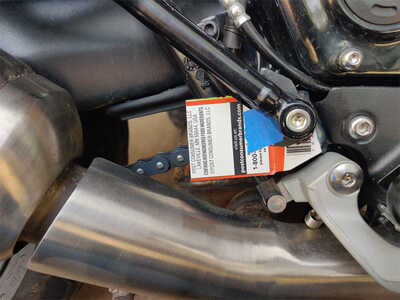
Rear Lower Mount Area:
This is going to be quite a bit of work.
Work area:
Utilizes both footpeg mounting bolts, and one rear footpeg mounting bolt. Three levels of 1/4" plate. This rough template is the bottom layer. It will move the footpeg out 1/4" from stock. The stack of three plates maintains the correct rear footpeg mounting leg location, and provides clearance around the rear master cylinder for service.
Keeps the lower rear strut tied in close to a strong part of the frame to limit bending/twisting forces. Maintains ground clearance. Provides a clean appearance when the sidecar isn't mounted to the bike.
Hold my keyboard and watch this! 🙃
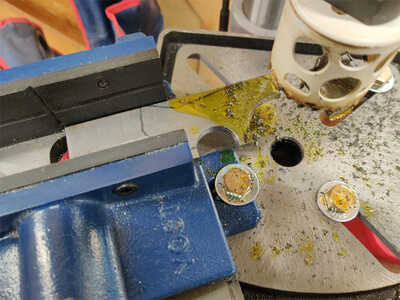
First plate made & test fitted. Came out well. Should be the most detail intensive plate for the build.
Cheated by using a couple of hole saws to help create the rough shapes.
If all goes well, tomorrow plate #2 will get fabricated and welded to plate #1.
Slow going, between rounds of fetch, and bouts of attention with the Shop Forepup.
Hold my keyboard and watch this! 🙃
Rest between bouts of welding lets the metal cool down between and reduces warping. At least that’s what I am saying to justify play sessions with the monkey in training.
Illegitemi non carborundum est!
Lots of distractions today. Did manage to get layer #2 shaped, welded in place and drilled for the rear footpeg mount.
Made the CbAD template for the 3rd and final layer. With a bit of luck this will get shaped, and welded up tomorrow. The sidecar Heim joint plate will bolt up to this plate. So the holes will be drilled once that section of the sidecar frame is completed.
Hold my keyboard and watch this! 🙃
- 29 Forums
- 11.9 K Topics
- 93.6 K Posts
- 5 Online
- 5,625 Members
