The 2026 Sidecar Rally registration is now open! Click here: USCA 2026 Rally Registration Form
Points for perseverance........
That's right. You've got a gazillion of them already.... ![]()
That's some crazy stuff there. I think you'd be welcome at any Aussie Outback sidecar camp as a long lost mate. Keep on keeping on!
Looks a lot more solid.. Any chance it can be tied together with the Lower subframe. Just to support or brace that Honda Aluminnienum weak link. ??? Just asking
@mgv8 looking for ways to do that. Have not come up with a clean way to do it, yet but still looking.
I am thinking about looping the steel subframe back and around behind the rear fender, but not quite there, yet.
It gets into the question of when is it time to just redesign and build the right subframe, with good materials.
Have not had the rig "down" for more than a week or so, since picking it up. Hate to strip the subframe and start new construction project, but will eventually. Ahh... the woes of not having a real winter to lay the rig up for a few months!🤪
Well Friends,
This post is kind of "bolt nerd" heavy, so be forewarned before diving in.
This afternoon, I decided to do a little more work in preparation for my spiffy new A arms arriving tomorrow evening, according to UPS tracking at least.
I bolted on the painted and enhanced Top Rear strut mount; blue loctite in the threaded aluminum hole, no loctite on heli-coil hole, and orange loctite on the flange nuts on the bolt ends.
Also sorted through the hell bucket and found bolts and hardware to eliminate zip ties from the Ohlins rear shock preload adjuster and the Wilco hack brake proportioning valve installations. Now bolted in tight.
Also figured out wire routing and a location for the tilt adjust switch that is still somewhat temporary until I take the tank off next time and wire up the nice switch that @Prmurat gave me a long time ago.
The main problem I wanted to attack today was the mounting points for the upper struts to the sidecar frame. I mentioned a while back that they had wallowed a little in the holes (through tubes) that support them in the top frame rail. The bolts were plenty tight, yet, but the ends of the tube had deformed from the narrow bearing surface of the mounting point contacting soft steel pluming tubing used in the initial fabrication.
The width of the bearing surface is about 3 mm, so side load, from acceleration/deceleration rolls the end of the tubing over and creates slop. When the struts were disconnected, I could deflect them about 15 degrees in any direction, without first loosening the "tight" bolts that were loctited in to the mounting point threads.
Pic shows bearing surface on mounting point and kinda messy tube it butts against when the 3/4" fine thread bolt is torqued down.
I was also not liking how the old DMC WA had selected grade 5 bolts that only came through the frame tube far enough to engage 6 threads max into the two mounting points.
I faced off the tube ends with an angle grinder and finished with a file to get a smooth mating surface on both ends, for the bolt, washers and mounting point to ride on. Figured starting with it flat might help.
Then hopped on my little sissy bike for a pleasant run to the hardware store for some bolts and washers:
Found some longer grade 8 bolts (on left) vs. the grade 5 bolts from the wankers in WA that were too short. Sheesh, almost $10 each!
The original install had a split lock washer under the bolt head and nothing between the mounting point and frame through-tube. I applaud the thinking of using a lock washer, but I think in this application, the flex in a split washer lets the bolt rock back and forth, and deform the already kind of soft steel that the through-tube is made of.
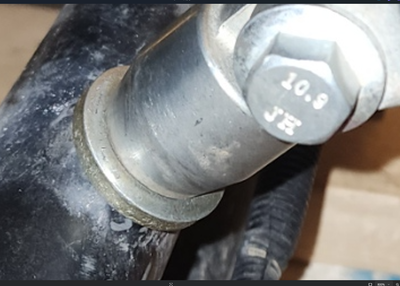
Pic: Bottom bolt is original, with split lockwasher. Top is new bolt with grade 8 hardened flat washers. Will use orange loctite and plenty of torque for the locking fuction.
Now you are probably noticing, you bolt nerds, that the flat washers fit surprisingly tight on the bolt shaft, when compared to typical 3/4" flat washers you would pick out of the bin at the hardware store.
Here is where it gets a little obsessive:
I did not like the slop in the the 3/4" washers, there was probably 3 to 4 mm of looseness due to the center hole being oversized to fit loosely.
However, the 5/8" hardened, thick washers, just almost fit, when I tried them in the bin. There were no 11/16" hardened, thick washers available, so what is a bolt nerd to do?
Well, since it was only 4 washers required, get the dremel out with a carbide bit and enlarge the holes in the 5/8" washers to just fit snug on the 3/4" bolt shaft. It went pretty quick doing them two at a time. Fit real nice!
Cleaned up the face and the threads on the mounting point (wire wheel in Dremel for threads.) Before pic, didn't shoot the after.
Then did a test fit on bolt length, with the two washers. Ended up shortening the new bolts by about 6mm to be able to tighten them fully with out bottoming out in the mounting point.
I will now be starting out with rock solid mounting points on the top strut mounts, for reassembly. Note the thread engagement into the strut leaves a little to be desired as well. May make a longer strut, or shorten the front A arm by 13mm or so, depending on how long the threaded portion is that the Heim joint goes into. Would like to pick up another 3 threads of engagement on the top strut than it currently has.
C't'd
c't'd
View from under the sidecar, bolt, grade 8 thick washer, frame through tube, grade 8 thick washer, mounting point stack. The thick washers are a little larger diameter than the face of the through-tubes, so provide as wide an area as possible to spread the clamping load on to. Might prevent the deformation and loosening of the mounting points...
I did not crank the mounting points down tight, since I would like to be able to rotate them as I fool with top strut attachment, once the A arms come in. I think more rigidity was achieved, though.
Foot note: Anyone with an old DMC hack might want to think about taking a look at the area where the mounting points for the top struts join the frame tubes. Probably ok, but definitively a source of play.
I probably had enough fun for the day with this little trip down a rabbit hole, but did study the potential position for a 3rd top strut mounting point for the bike side.
I sat on the bike and checked out where my calf/ankle would be in a few different positions on the right footpeg. (sittting, standing, leaning forward, etc.)
I decided the way to do it is to form a flat steel bracket that the top will bolt under a longer version of this M10 bolt that holds the top mount for the aluminum seat rail to the steel bike frame, here:
That bracket will come out and away from the bike far enough for a mounting point to be attached with a nut. It will then go down to the lower M12 bolt (that I expanded from an M10, a long time ago) that holds the bottom mount of the seat rail to the steel bike frame, here:
I'm thinking 1/4" (6mm) flat stock should suffice, with sufficient bosses to provide a little stand off from the steel bike frame.
A strut (to be bought/fabbed) will then run from that mounting point to either the middle or the rear mounting location on the top frame tube of the hack.
This is the currently unused middle top mount hole on the top frame tube:
I am leaning towards using rear mounting point, though, since that would form an additional triangular plane that would eat some of the acceleration and deceleration forces between the bike and the hack. TBD.
I can put the rig back on the road without the middle strut, and it will still be stronger than it has ever been, with the few recent mods and the new A arms (that I will also triangulate to the top frame tube, in addition to their already massive strength.)
I might temper my riding a bit, though, before adding the 3rd top strut, and a strap from the new middle top mounting point running to the front top strut mounting point that has always been able to flex forward and backward due to it's cantilever mounting to the bike frame.
Fun fun fun!
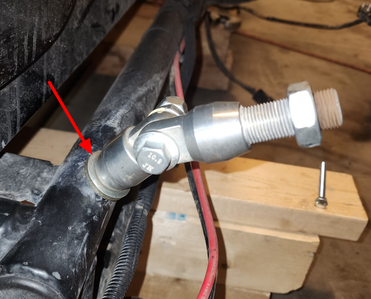
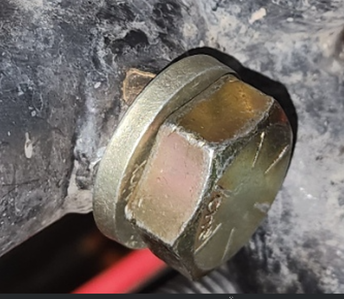
Not sure if I understand why a washer is needed here (see arrow) --
But, wait, is this the one you shortened so that it would screw almost all the way in without bottoming?
@ned I like Ben's thinking here. Up here those grade 8 washers are known as tension washers. Hardened so when torqued up they don't deform like a normal grade 5 washer will. My thinking is, once torqued up that tube the bolt goes through is now in compression with a hardened surface on each side, less chance of coming loose or moving with the pounding. Maybe over kill and I could be out in left field too.
@mgv8 Brian, that is exactly my thinking. The end point surface is much narrower, smaller diameter surface than the face or surface of the tube that it was tensioned against, without a washer.
The side load forces on the strut, mostly acceleration and deceleration differentials between hack and bike rocked the strut back and forth, with that narrow surface digging in to the soft steel tube face.
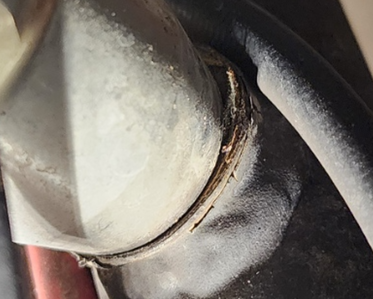
This is what it looked like, prior to disassembly:
I like to think that the hard steel washer will not deform as easily under those forces, and will spread the force over the entire surface of the tube end, not just a narrow ring on the inside of it.
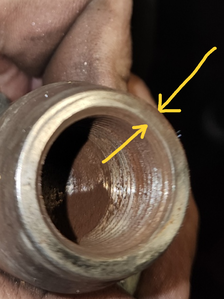
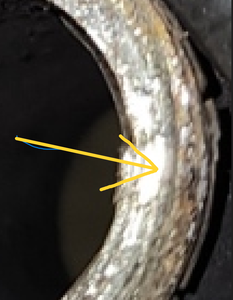
Yellow arrows show the face of the mounting point. It was not flat, rather tapered, so the inside edge was all that really touched the tube:
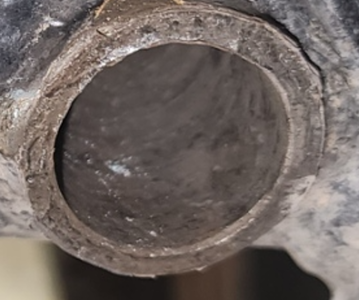
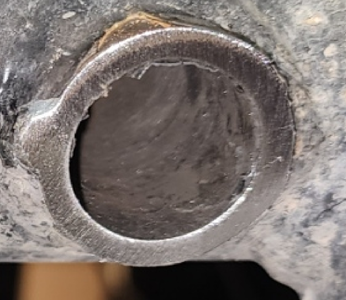
This is the face of the tube, prior to cleaning it up. It had a deep groove worn in it from the tapered mounting point rocking back and forth on it:
Lighting is better on the front tube; shows the ridge/groove that the end point rolled/gouged into the soft steel. A few thousands of an inch translated into quite a bit of movement at the end of the strut:
After cleaning it up with an angle grinder and file, it gives the hard, flat washer more surface area to sit on. Hopefully to stay nice and tight against, with no rocking movement.
Blow up shows just how much smaller diameter that mounting point face is, when compared to the washer and tube face. I suppose if I were smart, I would take it down 10mm or so to get rid of some of the taper and give it a wider contact face.
It was a similar story on the other side, where a split washer was installed as the locking feature. The split washer could flex as the bolt was rocked back and forth, thus wearing a groove into the tube from the split ends of the washer and making things looser and looser.
Some silly stuff, but I am pretty sure things moving like that contributed to the metal fatigue on the A arms below, over time and use.
Once the A arms failed, the top rear strut mount was next to go, as it carried all back half of the hack weight, on a lever that essentially pried the heads off of two M8 bolts... ouch!
@ned Yep, shortened the big, new bolt to just about the full threaded length of the mounting point, after accounting for the two washers and tube it passes through.
Old bolt was too short for decent thread engagement with only one washer. Probably only bolt they had, so they didn't bother to put a washer on, between the mounting point and sidecar frame tube.
Dane, VERY smart, big improvement.
Two Million Mile Rider
Exploring the World in Comfort
Oooh! I get it now. Thanks Ben Franklin and MGV8.
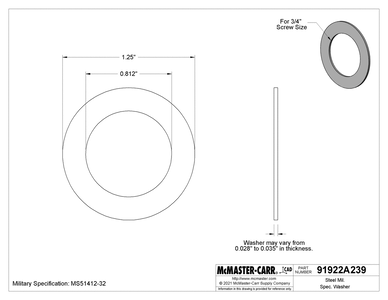
Follow up question. I actually reworked all my DMC struts last summer more or less the same way as you except with much thinner washers. Rockwell B40 which is at the high end of Grade 8 hardness, but much thinner than yours. THESE --> https://www.mcmaster.com/91922A239/
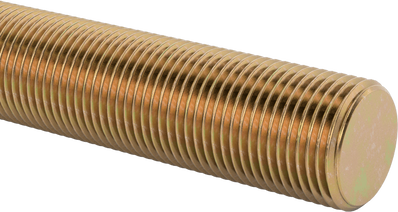
I also replaced all my 5/8 threaded rods with Grade 8. These --> https://www.mcmaster.com/3313N805/
Cut to length to get max thread engagement.
All the 3/4" stuff (bolts, washers, jam nuts) also got replaced with zinc-yellow chromate-coated Grade 8 stuff.
I didn't flatten the mating surfaces like you but my mating surfaces looked OK in my recollection. Can honestly say, though, that I did not inspect them closely. (and my close-up eyesight is kinda sucky haha)
My follow-up question is, you think I'm OK with the thin washers? Keeping in mind that my rig is not getting torture-tested anytime soon.
@ned Ned, i think for any sort of normal driving, the thin washers will be just fine.
I was standing in front of a rack of bins at the local Ace hardware store that happened to have both thick and thin washers, so I just went with the thick ones because I could, and I planned on trimming the bolt length to fit for max thread engagement, anyway.
Thanks for the link to Mcmaster, I am shopping for ends and internally threaded rod to make up the 3rd strut.
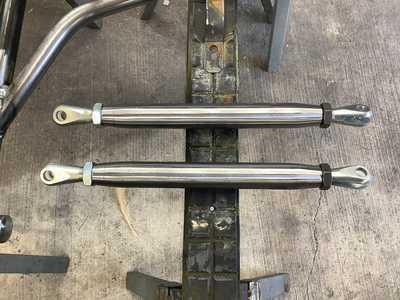
I am contemplating replacing the other two, as well, to get more thread engagement. If I do replace the existing struts, I think I will use ones with both left and right hand threads, like Chuck does on the ones he makes, so they can be adjusted without removing the ends. (Turnbuckle style.)
Yeah, the "Chuck-style" struts are the bomb! Definitely better than the "one-way" struts that the big sidecar makers sell.
https://www.mcmaster.com/products/weld-nuts/nut-type~tube-end/. For when you want to build your struts.. Both left and right hand thread.
- 29 Forums
- 11.8 K Topics
- 93.3 K Posts
- 4 Online
- 5,604 Members
