Speedy & The Spyder (A lightweight, unintimidating beginner friendly rig)
Suspension Day:
Going to paint all the links and hub carrier black. Thinking satin instead of gloss. Disassembled everything, and there are some enhancements that will get done during the reassembly.
Getting parts ready for paint.
In order to properly set up the suspension, shock travel and vertical positioning is pretty important. This shock doesn't use Heim joints, or rubber/poly bushings. Alignment is really critical to mitigate stiction, and wear.
Couldn't find the specs on the shock, so the spring was removed to measure stroke. Found the shock mounting orientation matters. If mounted in the Upside Down position (USD) the shock will cavitate at the top of the stroke.
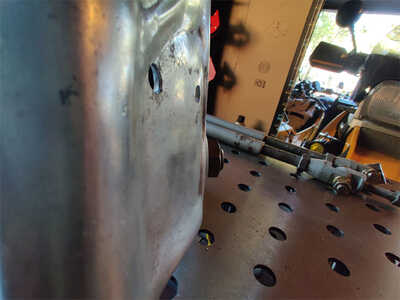
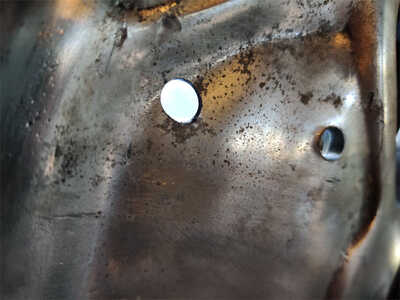
I'm kind of excited about what was found out on the shock. I think it will require new mounts. If so, I'm going to take advantage of creating a new upper mount that allows both mounting points be through the metal embedded in the body. Currently only the bottom bolt goes through the metal.
What this will allow is using flat head bolts through the tub. That eliminates the bolt and nut inside the tub. So the side trim panel can fit tight to the contour of the tub side.
Bolts circled in green are what will get replaced with flat face fasteners, same as the three fasteners above that hold the fender in place.
Hold my keyboard and watch this! 🙃
Scott, we have received a couple written questions from your viewing audience, they are....in no particular order:
In picture #3 above, what is your intended use of the air shock ?
In picture #4 above, why is your 8 year old little girl neighbor wearing only rubber thongs on her feet, in a shop with dangerous materials around ?
Exclamation: Did you think we would not SEE those tiny little toes, with toenail polish on them, peeking out of that rubber thong ?
![]()
Two Million Mile Rider
Exploring the World in Comfort
Hi Miles,
Can't wait to read about your latest European Vacation! 🤩
Motorvation made this an option for load leveling. Same plan here. With this option the coil over shock was moved to the web of the hub assembly. The air shock was installed where the coil over would normally be. Since the plan is to install an air compressor, a small tank and electric solenoids will be added with a 4 pole switch on the bike to make adjustments on the fly.
That my friend and neighbor will step foot in the garage, I'm not going to argue. I remember as a teenager, working in the garage on the latest drag car, or track car with all our girl friends hanging out. My how times change. lol I'll make sure to let her know you marveled at her youth.
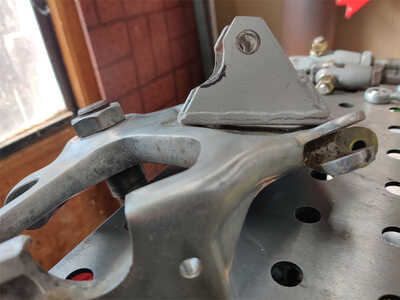
One of the enhancements that will get done is to shape the lower shock mount correctly to fit the web. Motorvation felt a flat shock mount attached to a sculpted web was okay. I can't disagree, since there are no reported failures. But it doesn't look very nice. The shape is a lazy S. Debating on whether to do a multi-piece backbone plate, or heat and bend up a piece. Need a cup or two of coffee to clear the cobwebs.
Hold my keyboard and watch this! 🙃
Mulling over what to do about the lower shock mount that bolts to the hub. Definitely an afterthought on Motorvation's side of things. Not sure how the original designer would feel about what was done. Pretty "hack". To be fair, and as stated previously, the original mount lasted with no signs of possible failure for over 10,000 miles (if I understand the original owner's info correctly). I'm just not comfortable putting my name to that. So it will get enhanced, one way or another.
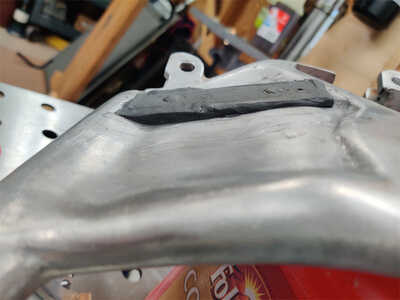
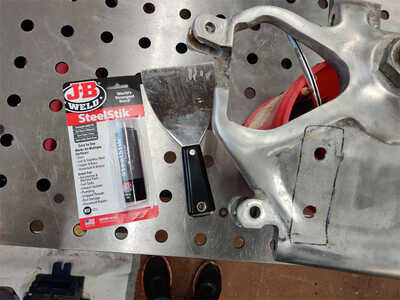
* ETA: after a couple cups of coffee to ruminate over this, I started thinking about using a two part metal epoxy to build up the area. Learned this is something done in the aerospace industry. They call it "liquid shim". Did a bit of research, and found a few choices. Now to see if any of them are available locally. *
In any case, this is what will be dealt with. Where the shock mount mates to the hub, is pretty curvy. The lower hole is right at the edge of the skeleton.
Think it will start with a piece of 1/4" plate. That thickness provides plenty of meat to thin out as needed. Like around the bottom corner where the hole is. I don't currently have a press, or oxy/acet torches. So I might try cutting separate pieces, shaping each piece then weld them together to create the back plate.
Oh yeah, found out this tub was built with an aluminum structure embedded into the fiberglass. That matches the brochure. I'm guessing Motorvation switched to using steel at a later date (total WAG on my part). I'm looking forward to see what this sidecar weighs. Paws crossed it is less than the reported 190 lbs.
Hold my keyboard and watch this! 🙃
It must have been worth repeating ![]()
Two Million Mile Rider
Exploring the World in Comfort
Posted by: @ben-franklin
Great minds? 🍻
Couldn't find the 3M liquid shim epoxy, but can always find JB Weld products in a rural community. 😎
I'm feeling better now. Funny how something so trivial can really chafe my hide. Motorvation should have done this during the build. Set the original bracket in place to make sure the fillet was correct. After lunch the holes can get re-drilled, then it will be time to start hanging stuff up to paint.
Hold my keyboard and watch this! 🙃
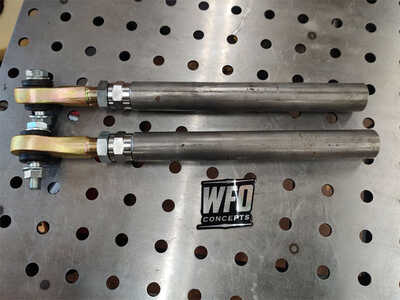
New struts came in yesterday Speedway Motors has a good selection and pricing. Ended up getting three different lengths, with the thought to minimize the amount of threads showing for a cleaner look.
Also painted the suspension links. They are pretty pitted from corrosion. The lower longitudinal link is also bent up. Will replace them all with new when the rig is stripped down for paint. The Heims are all new (previous owner bought them). So just the tubes need replacement.
Hold my keyboard and watch this! 🙃
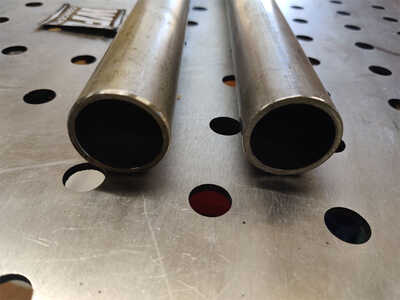
DOM tubes showed up today. 😀
Ordered from WFO Concepts, which is a really great custom 4WD shop out of Northern California. I've purchased product from them before. Always had great service, and great pricing. Notice how clean the cuts are, and how they finish the edges. Metal supply shops normally just chop the pieces with pretty big variances in length. These tubes are spot on the 12" each, as ordered.
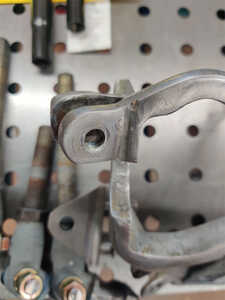
I'm going to have to get more bolts. Motorvation didn't use the correct bolts for the hub. Good example of what happens when the bolt grip is too short. Thankfully this lug doesn't need to be drilled and sleeved, but it is close. The threads of the bolt cut into the aluminum. Wouldn't have happened if they used the right product.
MX des Nations is this weekend. Not sure how much more work will get done. Priorities, priorities. 😉
Hold my keyboard and watch this! 🙃
- 29 Forums
- 11.8 K Topics
- 92 K Posts
- 2 Online
- 5,501 Members
