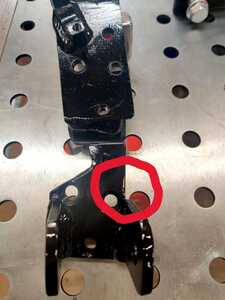
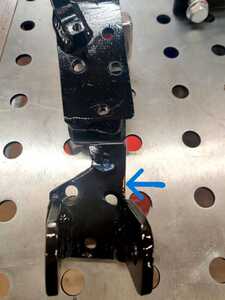
Nyet, Nein, and NO....the yellow paint I see is not a "reflection".
I performed a radio spectrograph to compare the gloss black to the yellow, and it clearly shows as yellow, and not a reflection from a different surface being reflected.
I am afraid...afraid I say...that I must report this, as anytime I use the NASA Radio Telescope to check things, I am required to report my findings.
Two Million Mile Rider
Exploring the World in Comfort
Maybe SYZ is getting a bit jealous of all the time spent on Speedy & the Spyder. 😉
Hold my keyboard and watch this! 🙃
Front Lower Bracket is done. Shortened the joint bolt shortly after taking this picture. Need to repaint in a satin finish, so it blends into the bike better.
Bike Bracket final install.
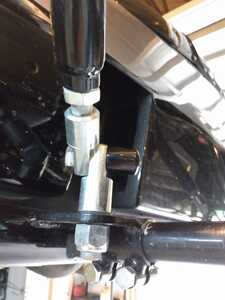
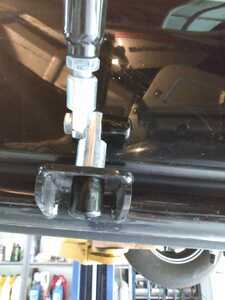
Joint Bracket bolted to Bike Bracket. This bracket stays with the sidecar. Bottom mounting point was drilled and tapped into the bike bracket.
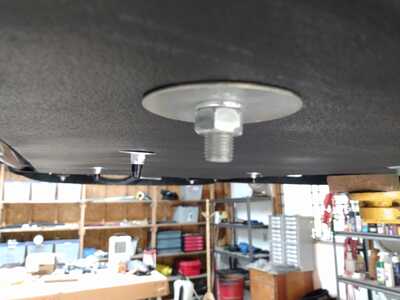
Backside view. To get a good torque on the bolts without stressing the Allen heads, the three nuts are not welded. Two piece Anti-Vibration washers will keep it together. This picture does a good job of showing the distance between the centerline of the joint, and where the crashbar assembly attaches to the engine & frame. A bit more than 6" of torsional load. That is a bit unnerving. IF this turns out to be a competent rig, it will be worth creating a real subframe unit which mounts the joint as close as possible to a vertical line though the engine mounting bolt.
Hold my keyboard and watch this! 🙃
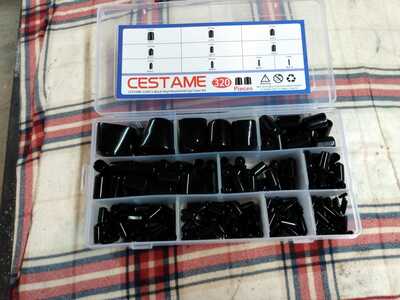
Scott, order on Amazon:
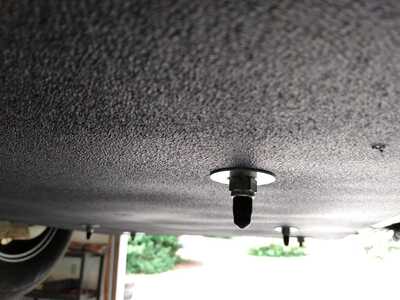
These are the Black Rubber caps that comes in a large assortment of different sizes, to place onto the exposed threads of any bolts, or the nuts, to keep corrosion off the nuts or threads.
I have done this to my last 3 sidecar rigs, and I used ONE drop of Super Glue inside each Black Rubber Cap to hold the rubber cap on, and make it stay on, until I need to remove it with a simple twist of the rubber cap.
Two Million Mile Rider
Exploring the World in Comfort
Posted by: @miles-ladueScott, order on Amazon:
These are the Black Rubber caps that comes in a large assortment of different sizes, to place onto the exposed threads of any bolts, or the nuts, to keep corrosion off the nuts or threads.
I have done this to my last 3 sidecar rigs, and I used ONE drop of Super Glue inside each Black Rubber Cap to hold the rubber cap on, and make it stay on, until I need to remove it with a simple twist of the rubber cap.
-- attachment is not available --
-- attachment is not available --
-- attachment is not available --
-- attachment is not available --
-- attachment is not available --
-- attachment is not available --
Looks very clean! Thanks for sharing the kit info. 👍
Hold my keyboard and watch this! 🙃
Depending on how much of the thread or bolt head is exposed, you’ll need to trim them down some to get them on the fasteners.
Illegitemi non carborundum est!
Unpainted plates bolted to the upper bike brackets are the base pieces that will eventually get connected to the sidecar upper struts. Figuring out where and at what angle the strut eye tabs will need to be welded requires setting up the rig. So the next step is to build a setup jig.
Once all that is done, the plates can be shaped to look better.
Front plate: Needs a bead or two on the rear edge at the bolt head. Plate was just a bit short to cover the bolt head flange.
Rear plate: Top edge needs to be chamfered to make running the front bag strap easier.
All four mounting points (green circles) ready for setting up the sidecar.
Waiting on the DOM tube to complete the lower strut arms. Should be here next week sometime.
Meantime the setup/alignment jig will get built, and the sidecar tubes honed to remove rust.
Green lines in upper circles are expected angles for the strut eye tabs.
Hold my keyboard and watch this! 🙃
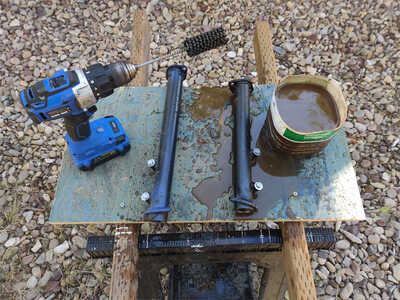
Pulled the frame tubes out of the tub. Honed out the rust with white vinegar and a 120 grit ball hone. Thanks to the work done by the previous owner the honing went quick. A bit messy. Think I might be permanently pickled. Used the same vinegar to sand the rust off the connecting tubes. Will go together pretty easy, and should hold adjustment well. 😎
Need to get some new hardware for reassembly. Great opportunity to take Speedy for a ride. See if there are any handling changes with the frame tied together near the head stock.
Hold my keyboard and watch this! 🙃
Maximum contraction.
Will be interesting to see how far out they end up once the rig is setup right. It is going to be tight with a 48"-ish track, and the 8"- to 9" lead to match the 54" wheelbase of the Speed 400.
Hold my keyboard and watch this! 🙃
I'll admit, yesterday was a lot of work. Went to bed with sore muscles, and woke up even more sore. 🤣
Fridays for retired people are the perfect day to practice relaxation exercises in preparation for the weekend focus on said relaxation. Going to take my own advice. lol
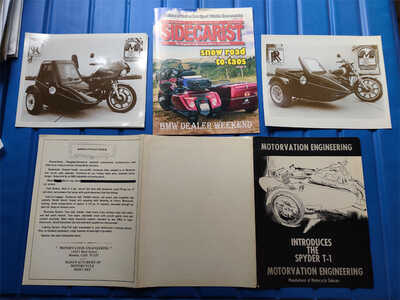
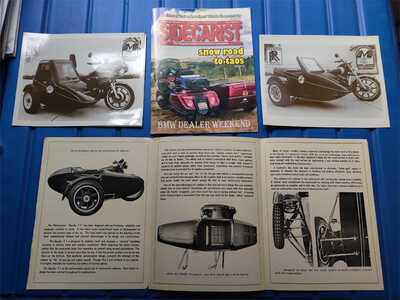
Now for a bit of awesome news... The second most important piece of this project showed up today. Yep, the latest issue of the Sidecarist Magazine with some really great articles, and awesome stories. Oh, and an original brochure of the Spyder T-1 came in the mail as well.
To say I'm beyond excited by finding this brochure would be an understatement. 🤩 🤩
Hold my keyboard and watch this! 🙃
forgot to mention:
Hold my keyboard and watch this! 🙃
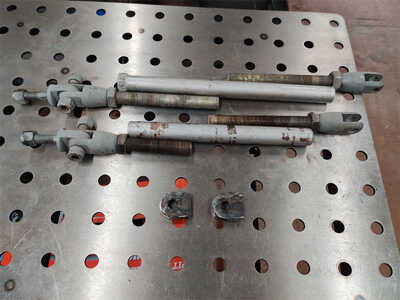
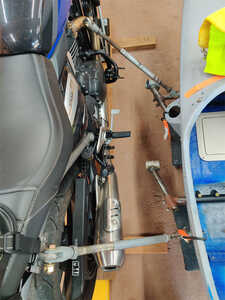
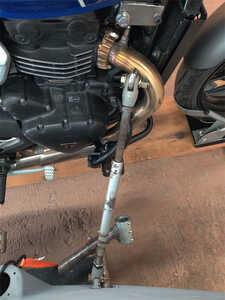
Almost forgot about the struts. Disassembly of the short strut took a bit of heat, penetrating oil and persuasion. All threads and nuts are in great shape, with just a bit of cleaning needed.
Hoping to be able to re-use both of the original struts. They each have right and left hand thread clevis ends, with a large adjustment range. If they can be re-used, I'll weld a nut in the middle of the shorter tube to ease adjustments. The long tube has a nut already welded to the one end.
The key will be the rear strut clearance around the exhaust muffler of the motorcycle.
Hold my keyboard and watch this! 🙃
Small projects getting completed while waiting on the tubing to finish the final lower links.
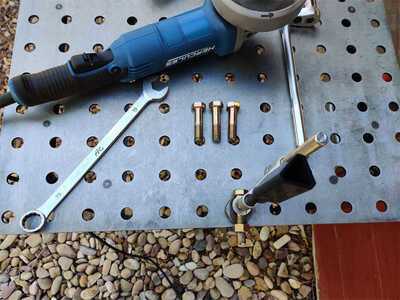
Noticed that the original clevis joint bolts were fully threaded. That's not the correct way to do things. The clevis should have a bolt with the grip just slightly longer than the clevis width (same as what I did for the lower joints). On these units it means finding a half inch diameter bolt with a grip slightly over 1" long. Closest I could find were 2-1/2" long bolts to get a 1" grip. I'm getting pretty good at shortening bolts, but miss not having a local Fastenal shop. So that was the morning project.
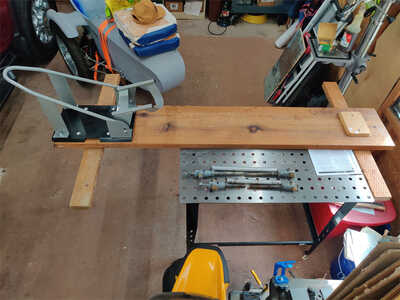
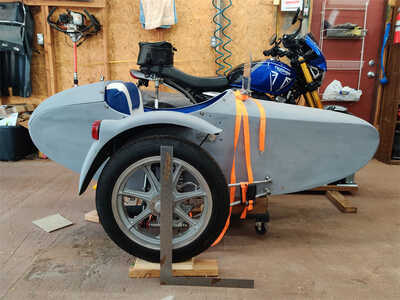
After lunch it was time to start work on the setup jig. This is the start of the bike side of the jig. 2x4s are centered under the wheel base of the bike. The garage floor isn't too level, so this allows shimming under the 2x4s for the bike and sidecar jig to get a level working plane. Also makes it easier to strap the bike into "rider sag", condition.
Hold my keyboard and watch this! 🙃
Good news - Bad news kind of day.
First the good news: Two concerns I had were:
- The ability to get enough longitudinal adjustment between the lower bike mounts and sidecar mounts.
- Rear strut clearing the mufffler without resorting to a curved strut tube.
Looks like there won't be an issue with either concern. 😀
Will require a longer front strut. The rear strut in the pictures will do well on the front, and a new longer Strut tube will be obtained for the rear. Or maybe just get two new tubes thinking optimistically that this is going to be a good pairing. 🤔
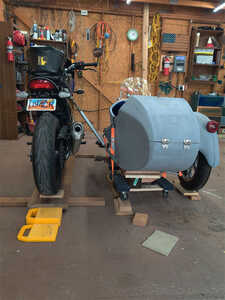
The initial setup will be done with the bottom of the sidecar tire 1.5" lower than the bottom of the bike tire. At a 48" track width, that creates an approximate 1.8 degree lean out. Still need to complete the sidecar side of the setup jig. Going to setup the car with a slight nose down attitude. This will match the angle at the bottom of the tank, and the bikes overall nose down slope.
Bad news is UPS in SLC lost the package with the DOM tubing needed to complete the lower strut connection to the bike. Re-ordered the tubing, which should arrive next week. Amazon seller was quick to reimburse the cost. UPS is normally pretty good, but the SLC facility can get overwhelmed at times. I've got plenty to stay busy with, so not a big deal.
Hold my keyboard and watch this! 🙃
- 29 Forums
- 11.8 K Topics
- 92 K Posts
- 4 Online
- 5,501 Members
