Posted by: @ckasemanI joined this forum specifically because I’m hoping to put together an AT cargo box rig, so imagine my pleasant surprise when this was the very first post I saw upon the very first time I logged in. Any chance you’d be willing to sell me this one when it’s done, since you’re out of the country for a while anyway? I’m sure you could have him throw together another one before you get back from your trip, right? Right?
Anyway, I’m watching this build with great interest.
Cory @ckaseman, send me an email, to: midliferider@aol.com
Let's begin the conversation off the forum.
![]()
Two Million Mile Rider
Exploring the World in Comfort
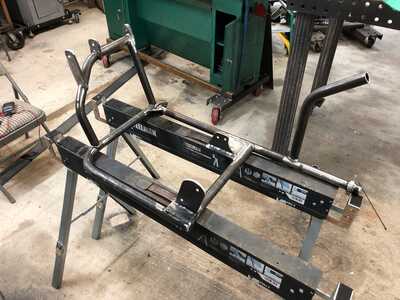
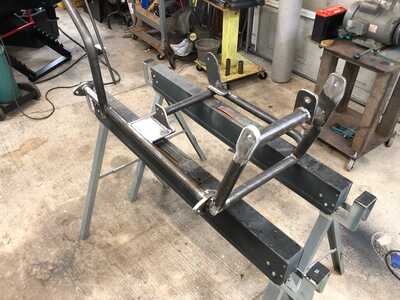
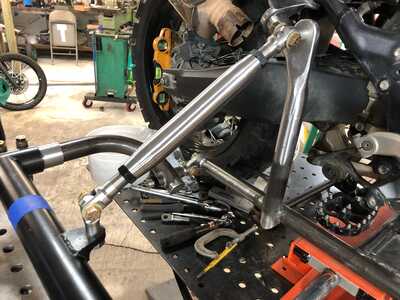
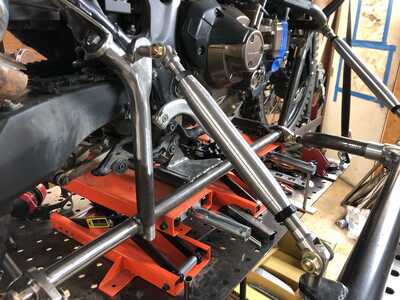
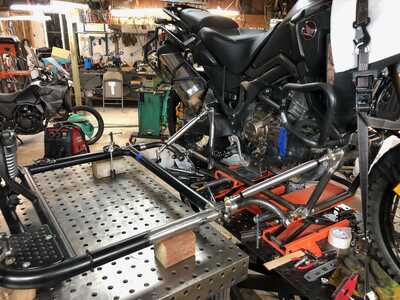
@miles-ladue Chuck continues to refine his subframe design for the AT! Should be stout. The connection to the two foot peg mounting locations on the frame is about as solid as you can get.
Definitely looking like a substantial addition to strength all around.
I'm looking forward to see what he does for the upper rear strut. 😎
Hold my keyboard and watch this! 🙃
Posted by: @scott-hDefinitely looking like a substantial addition to strength all around.
I'm looking forward to see what he does for the upper rear strut. 😎
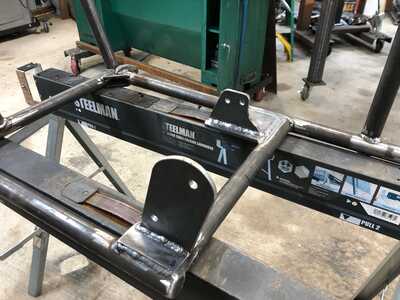
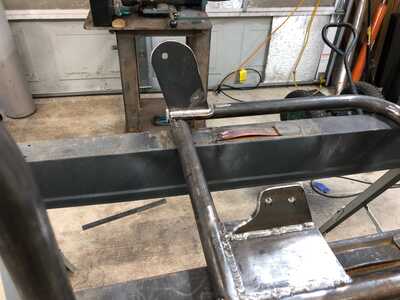
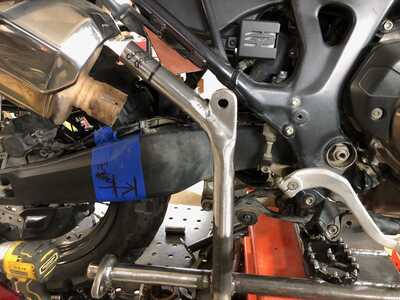
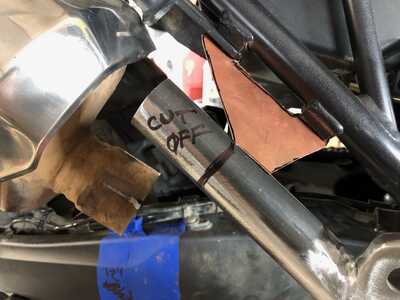
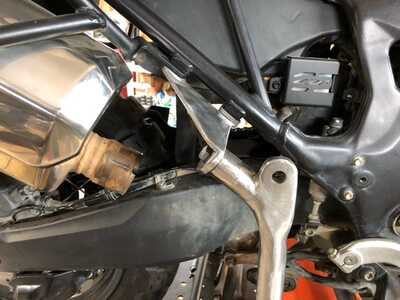
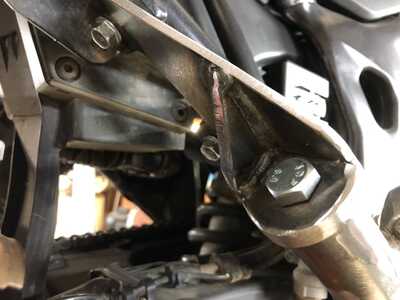
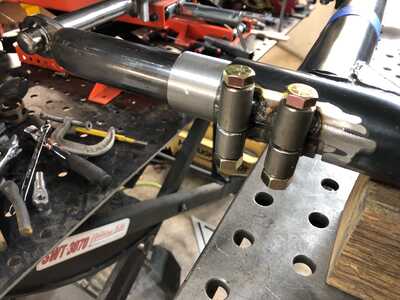
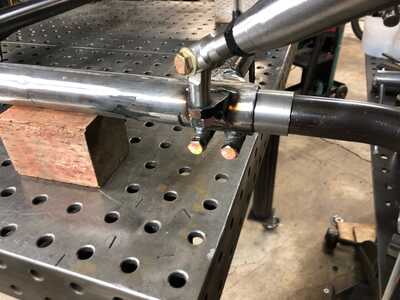
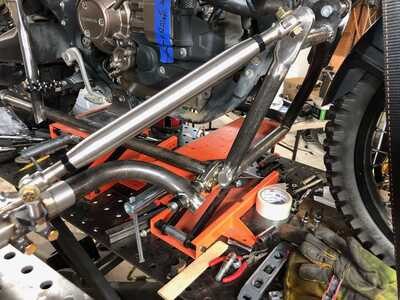
Scott, only because you requested it, here are two simple pictures of how he is attaching the subframe of the bike in the area of the rear upper mount, to be used for a mounting strut from the subframe to the sidecar frame.
He is using the former pillion foot peg mount on the bike, and bolting a fabricated mount to that location, then will install a mounting strut from there to the sidecar frame.
Two Million Mile Rider
Exploring the World in Comfort
Maybe when I grow up I can make stuff like that.
😯Posted by: @brstrMaybe when I grow up I can make stuff like that.
Dude! Don't Do IT!!!!! Never Grow Up!
"Growing up" comes with responsibilities, compromise and agnst. Rail against adulthood.
😉
Hold my keyboard and watch this! 🙃
Solid! 👍Posted by: @miles-laduePosted by: @scott-hDefinitely looking like a substantial addition to strength all around.
I'm looking forward to see what he does for the upper rear strut. 😎
Scott, only because you requested it, here are two simple pictures of how he is attaching the subframe of the bike in the area of the rear upper mount, to be used for a mounting strut from the subframe to the sidecar frame.
He is using the former pillion foot peg mount on the bike, and bolting a fabricated mount to that location, then will install a mounting strut from there to the sidecar frame.
-- attachment is not available --
-- attachment is not available --
Hold my keyboard and watch this! 🙃
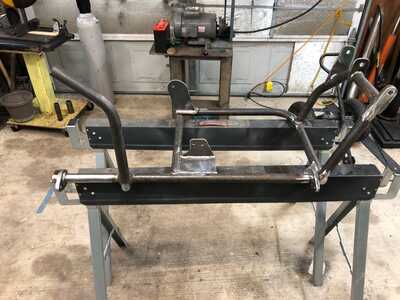
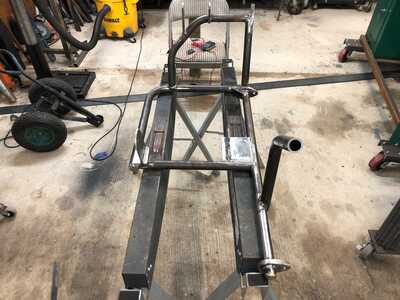
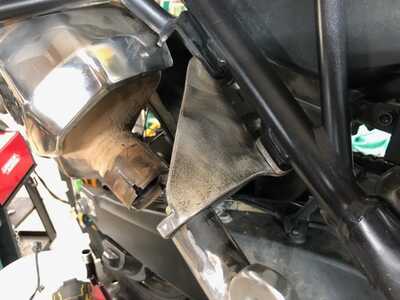
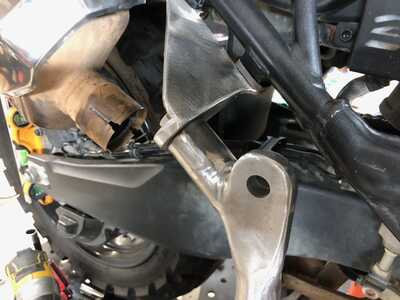
Four more pictures of the now completed upper rear mount.
On a personal note...my "friend" that is building this for me, is himself going through some tough medical issues, and I won't say more on that, as it's his personal business, but keep a good thought in your mind for @54vintage.
Oh, and yes, Scott, this is just a temporary mock up, so the finished product, once powder coated, will have those locking washers at every bolt and/or nut connection.
![]()
Two Million Mile Rider
Exploring the World in Comfort
I like the idea of tying the upper and lower points together. 😎
I had forgotten the '18 rear subframe was tubular steel welded to the main frame.
Hold my keyboard and watch this! 🙃
6 more pictures, as the work progresses into a rolling chassis. He will start out with a Ural wheel and tire, as that is what he has available in his shop, but the finished product will be a Warp 9 wheel for the sidecar, and a personally chosen tire on that Warp 9 wheel.
Two Million Mile Rider
Exploring the World in Comfort
Looking good!
Hint, when setting up the LL, you will have some choice in how much front wheel travel is possible, based on overall shock length and travel. Chuck will do pretty much what you want here.
If you pick a shock, then know it's max travel, you can work the LL through it's max travel, controlled by the lower mounting point location you select on the swingarm (ok, Chuck picks.) Once you have that, you can get a ratio of what the front wheel travel, top of shock to bottom of shock bump stop. This will then make it possible to calculate the spring rate needed, to support the loaded weight of the bike on the front wheel, with about a 30% total sag, with the frame of the bike level, front to back. (think about the combination of things required to have the bike both level and at the correct, loaded sag.)
Don't be too surprised if you have to do an iteration or two on the springs to get this totally "right" in operation.
You do not want it undersprung. I am pretty sure that the impact shock that came from bottoming out my LL, kinda hard in a ditch crossing, is what broke the bike frame early on, both in front of the steering head and behind it. You can avoid that with the right springs. I think you know those stories, well, but if you want more details, ping me.
I currently run a progressive set of springs on the front; 45/60 N/mm rate, which works out about right on my setup (from Chuck) to get both sag right and a level frame.
Shock length, eye to eye, is 350mm.
Shock Travel is 84mm.
Motion ratio, where we ended up at for mounting the bottom shock mount is 1.8 to 1, wheel travel/shock travel.
Total wheel travel capability is 151mm (6").
If I were to replace these springs, I would likely dial them in at 50 N/mm as a straight rate spring, although Jeff's calculations at The Beemershop says 45 N/mm is ideal. My logic is: The current "progressive" set of coils on mine are fully compressed by preload to get sag set right. This means I am actually running on the 60 N/mm spring rate of the progressives, for any front wheel impacts. It is a little harsh, but not bad. I think 50 N/mm would be better.
The above numbers are only relevant to the exact geometry configuration/weight on my front wheel. However, once you know where the bottom shock mount is attached, you can get your motion ratio, loaded weight, etc. and calculate your specific "ideal" spring rate.
It is worth figuring out, before you hit something in the road and do a hard bottom out. Once the spring rates and preload are dialed in for proper loaded sag, you can fool with damping to suit your tastes.
Love seeing what Chuck is working on; he puts a tremendous amount of thought into what he builds, before he cuts metal. It shows.
I'm sure you are smart enough to not be doing this crazy shit, but it is nice to know you can! 🤣
https://www.youtube.com/shorts/3wMgKoXhHOk
or this
https://www.youtube.com/shorts/e8u4BIDjmWc
Dane @ben-franklin, my short reply is.... Chuck will be installing 2win shocks at the Leading Link, and at the sidecar swingarm.
'nuff said ![]()
Two Million Mile Rider
Exploring the World in Comfort
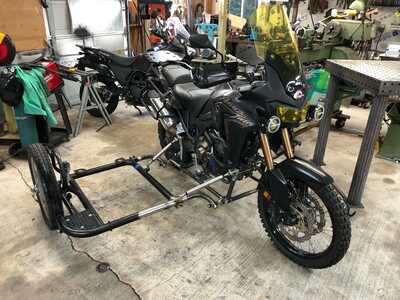
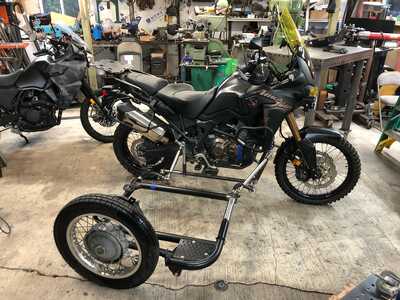
Latest photos, hot off the Internet, from Oregon to Portugal to Texas. Rolling chassis now, but the sidecar wheel/tire are only temporary, and he still needs to build the Leading Link front end.
Two Million Mile Rider
Exploring the World in Comfort
- 29 Forums
- 11.8 K Topics
- 92.3 K Posts
- 6 Online
- 5,521 Members
