The 2026 Sidecar Rally registration is now open! Click here: USCA 2026 Rally Registration Form
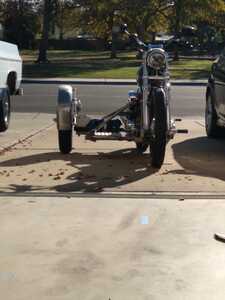
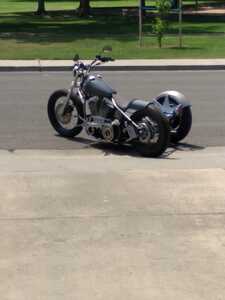
Looked pretty coordinated coming back up the driveway. 👍
My buddy just turned 70. He rides a street glide. Used to do club road races back in the '80s. He's a very skilled rider. Last year he came up to a stop sign, and just forgot to put his foot down. Bike fell over, and he kind of rolled off. Said it was the freakiest thing that has happened to him. A guy immediately jumped out of his truck and helped lift the bike, and made sure my buddy was okay. No drama, just a helpful guy. Probably another experienced rider who gets that sometimes things happen.
When my buddy got home he had serious thoughts to no more riding. Instead he quickly came to his senses and decided he would train himself to be more focused. Not a single issue since then.
Will look forward to your progress. 🍻 My thought is sidecars don't replace two wheels. They are an additive and addictive part of our fun. 😎
Hold my keyboard and watch this! 🙃
I will definitely concur that sometimes one's brain just forgets...to do the thing it has done forever. Overanalyzing is no good (just ask a golfer what happens when you analyze your putting stroke).
Chris, I agree that when the brain and body are about ½ second disconnected from one another it really breaks confidence in riding. Use the extra wheel - eventually you might not want the 2 wheel version! I'm pretty sure I won't be going back.
Illegitemi non carborundum est!
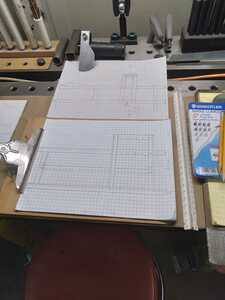
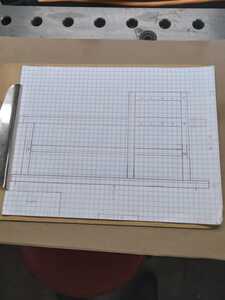
So, with the liquid sunshine coming down here, I started working on plan B. A rough 1/4 scale of a new chassis in PAD, (pencil aided design).
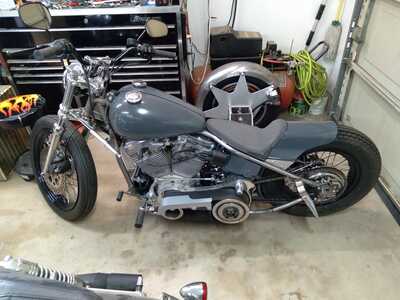
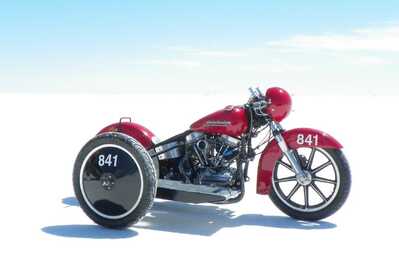
I include a pic of the Foley Racing record holding bike, which was the inspiration of my original chassis.
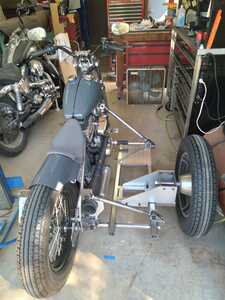
The original has 32 inches center to center between the wheels, and 14.5 inches of lead. After reading many posts here, I decided to make a few changes, even though this rig has nothing in common with a sidecar as far as weight distribution, center of gravity, drag, etc. and it performed well, I felt changes might make it even better.
So, the new design is 40 inches between the center of the wheels, and the lead will be adjustable between 8.5 inches, 10.75 inches, or 13 inches. Just to help tuning. I'm widening the space between the bike and the chassis a bit, so I can use the footpeg, and reducing the lean out I built in, to even go lean in, if needed, because it felt weird to me while riding it.
I'll use the same axle block I built, because it just bolts to the chassis, and needs no improvement. I use Online Metals to get my material, they have a material weight calculator on their site. Once you determine the amount and dimensions of the metal needed for a project, the calculator gives you a pretty good idea of what it will weigh, and I build this heavy, because of no car or passenger, so the calculator is a big help in designing this.
Will you use the same platform currently with mods, or build a totally new one? Either way, nothing like the smell of melting metal. 😎
Hold my keyboard and watch this! 🙃
(@scott-h) I'll just start fresh, mainly because there is about 10 lbs. of steel bar stock hiding inside the current chassis in the areas that would need modified. So I'll avoid that frustration, and build a new one.
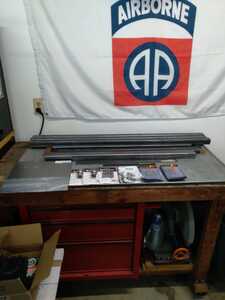
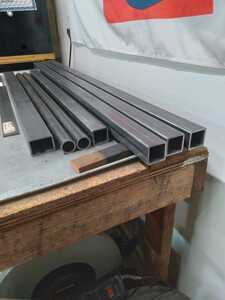
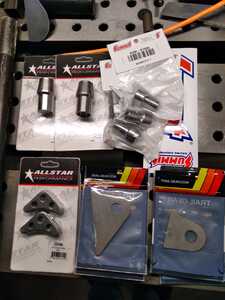
My new chassis has arrived. Ordered everything before 9am Wednesday, the Summit Racing parts came Thursday, and the Online Metal parts came Friday. Some assembly required.
Nice another project.... ![]()
I'll build this the same way as the narrow chassis was. It will be heavy and rigid. The narrow chassis, fully welded, before ballast was added, weighed 30 lbs. I'm shooting for 45 lbs. for the new chassis at the same stage of construction.
This is all .120 wall tubing, 1.5" square, 1.5"x2" rectangle, and 1.25" round. The round tubing gets the threaded tube ends, which receive the rod ends that attach to the lower bike mounts. The O.D. of the round tubing is the same size as the inner height of the square tubing. The round slides through both frame rails and locks everything together.
I'm playing tetris in the garage right now to make room for this project, and have no estimate of how long it will take. The first one was built a couple summers ago when we had temps. of over 100 degrees for weeks, (the garage hit 109 once) All the sawing and drilling has to be done outside, so the heat didn't really slow me down. But this time of year, I have to deal with atmospheric rivers, tule fog, the holidays etc. So this may take awhile.
Chris, I like it.
Take your time and do it right.
Tule fog, are you that close to the American River ?
Weather report here in La Rochelle, France is...rain.
Two Million Mile Rider
Exploring the World in Comfort
FlyingMonkeys Twenty miles from the end of the American in downtown Sac. Ten miles from the Sacramento river. I'm in the middle of millions of acres of farmland, so it gets pretty thick here. It's good for forming ice on your knees if you can ride through it fast enough. 67 and sunny 3 days ago, socked in with fog since.
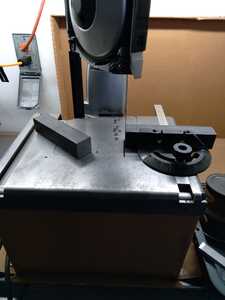
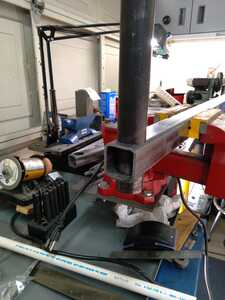
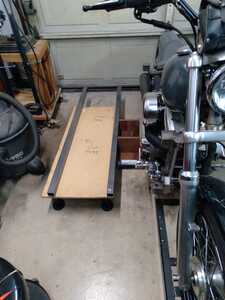
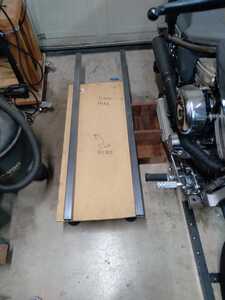
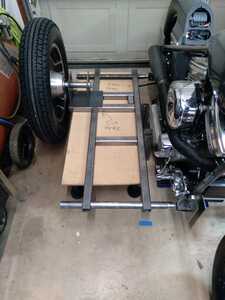
Some progress. Moved stuff around the garage to make room to build this, parked the bike in its spot and got it secured and level. Cleaned and inspected the new steel, deburred the ends and made a cut list. Also made the spacer that helps me keep the chassis parallel to the bike, and set the lower mount locations.
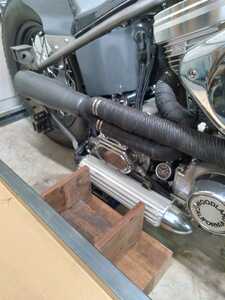
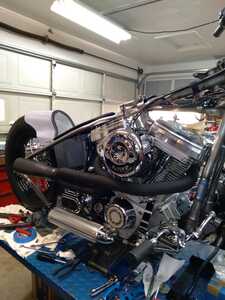
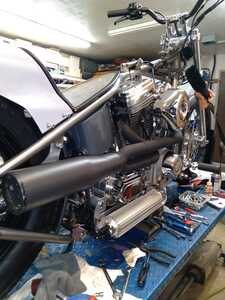
After I built the 2 into 1 exhaust, there was a big empty spot below the transmission. So I mounted a universal 2 pass heat sink type fluid cooler in that spot, and plumbed it with more -6 lines. I index off the cooler with a simple spacer, and along with the adjustable table, setting up the lower mounts is a breeze. While the lower bike mounts are the same distance from the ground, they aren't the same distance from the chassis.
The first chassis was set at 2 inches from the cooler, the new one will be 6 inches from the cooler. Now I can get a good visual of how the new spacing, with the main rails at 14.5 inches wide, looks.
Looking good. What is your thought on setting the front lower mount horizontal instead of vertical like the rear? Bolt clearance?
Hold my keyboard and watch this! 🙃
(@scott-h) Setting them 90 degrees from each other as I did, in my mind, would allow up and down movement of the chassis for lean adjustments, but make it impossible for any fore and aft movement. That worked. Then recently, while looking through a 2010 Harley sidecar parts manual, I see that they configure the lower mounts exactly like I did. Thought I was some kind of mechanical genius for awhile.....nope.
Posted by: @not-bob(@scott-h) Setting them 90 degrees from each other as I did, in my mind, would allow up and down movement of the chassis for lean adjustments, but make it impossible for any fore and aft movement. That worked. Then recently, while looking through a 2010 Harley sidecar parts manual, I see that they configure the lower mounts exactly like I did. Thought I was some kind of mechanical genius for awhile.....nope.
Very cool. Hadn't considered this idea.
I'm in the process of thinking through creating an actual sub-frame for the Triumph/Spyder build. All these details are helpful. Appreciate you taking the time to give your thoughts on this. 🍻
Hold my keyboard and watch this! 🙃
- 29 Forums
- 11.8 K Topics
- 93.3 K Posts
- 4 Online
- 5,604 Members
