BMW R1100 GS Based Rig Project
Posted by: @miles-ladueScott, if you don't find a suitable spring in your own parts collection, (which you probably will), contact Chuck @54vintage , as he may have THEE spring on hand.
The Ural cT chassis that is being used as the frame for my cargo sidecar rig, will NOT be using the drum brake, just the backing plate, so if that spring is the same one, he may have that available.
Chuck's email is: pica-pica1@hotmail.com
Many thanks Miles. 🍻
Hold my keyboard and watch this! 🙃
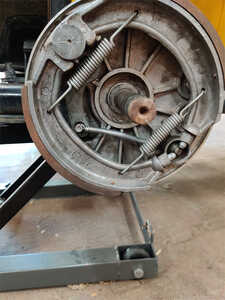
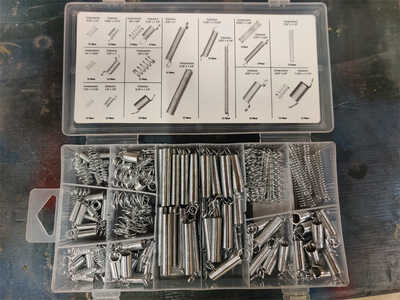
Posted a question on Soviet Steeds to see if anyone knew of a U.S. based vendor for brake parts. May have a lead. Will keep paws crossed to hear back. Meantime I did a "double spring" install from a kit of springs. It will be a 15 minute job to change out when the correct part gets here.
Also think I figured out why the brake parts look so new. The lever which activates the shoes wasn't manufactured quite correctly, and was binding up. Most likely the original owner of the Dnepr this came from deactivated it. Did a bit of work to get that functioning correctly. Ordered a new tool which i'm hoping will fit cable so it can be properly lubricated. That should be here tomorrow. With a bit of Good fortune it should be all back together, and ready for action. 🙂
Here is where we are as of today.
Spring kit of questionable quality
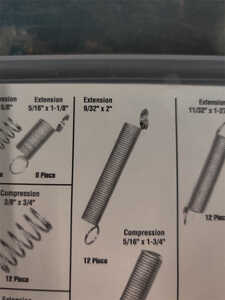
Specific questionable springs used
Hold my keyboard and watch this! 🙃
Yung Scot, from the Highlands of Scotland, did you manually check to see that you can rotate the cam on the brake actuator, to overcome the tension of those two springs ?
And, make sure you properly lube up the actuator cam that pushes those brake shoes apart. Lube the backing plate where the edges of the brake shoes make contact with the backing plate.
Then, before installing the brake drum onto the axle, manually engage the Sidecar brake, to visually witness the brake shoes engaging, and relaxing back to the unbraked position.
Two Million Mile Rider
Exploring the World in Comfort
Posted by: @miles-ladueYung Scot, from the Highlands of Scotland, did you manually check to see that you can rotate the cam on the brake actuator, to overcome the tension of those two springs ?
And, make sure you properly lube up the actuator cam that pushes those brake shoes apart. Lube the backing plate where the edges of the brake shoes make contact with the backing plate.
Then, before installing the brake drum onto the axle, manually engage the Sidecar brake, to visually witness the brake shoes engaging, and relaxing back to the unbraked position.
Yes sir, and even used the correct backing plate grease. Witnessed by the new Shop Foreman between snore fests on her raised princess platform right next to the work zone. 👍
This is all pretty old hat for me. In my early days at the automotive dealership, we were required to have our brake, lamp and smog license, along with our ASE master and specialty certifications. The OEM I worked for required us to maintain the ASE certifications. Up until retirement I had all the automotive and medium/heavy duty truck certifications. Stayed pretty hands on at every opportunity, as it was the more fun, relaxing part of the job.
Not something I normally discuss as it sounds like bragging. Certainly not meant that way. Just part of a very fun and incredibly fortunate career. 😊
Hold my keyboard and watch this! 🙃
It's not bragging, when it is the facts, and I believe everything you tell me, not just because I know you and like you, but because the Super Muttress/Shop Forewoman told me it is so.
Two Million Mile Rider
Exploring the World in Comfort
Tool for lubricating the brake cable came in. Tool works well, cable not so much. Holes in the cable sheath alllowed lubricant to leak out before entire length was lubricated. So along with the spring, a new cable will get ordered. Current cable works well enough to use for completing the foot lever project though. For now it is all back together and properly adjusted.
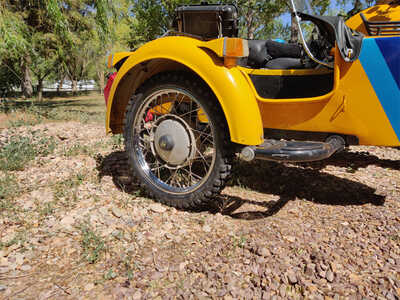
Definitely like the looks of the tall sidewall of the Block K on the 18" rim over the shorter sidewall of the Battlax 19" knobby tire. Totally subjective, but may sway the choice for the next sidecar tire.
Hold my keyboard and watch this! 🙃
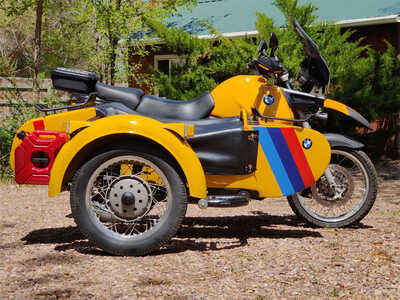
Finally getting back around to working on the Screaming Yellow Zonker. Today was a simple project.
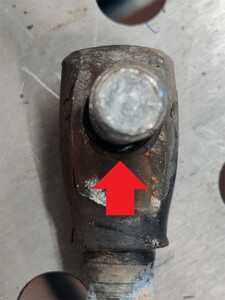
Plug welding, facing and drilling a new hole in an old clevis that had seen too many miles. Between the worn bolt and worn male clevis tab there was about 0.070" play. The thickness of the clevis tab was almost an 1/8" too thin, so there was no way to get proper torque on the assembly. Made for a very loose fit.
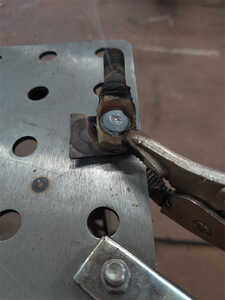
Plug welded the hole, then built up one face of the tab so it could be ground down to a nice tight fit. I like using copper as a backer when plug welding a hole. Does a good job of drawing excess heat away, and doesn't stick to the welding wire/rod.
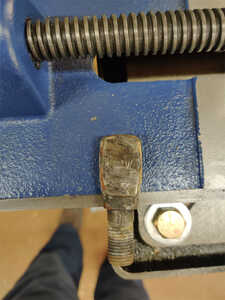
After grinding and filing, all that was left was to drill a new hole, and reassemble with a new bolt.
A summer of hard off road use, and that was pretty much the only point of excess wear. SYZ is a darned good rig, and I'm fortunate to have it. 😎
Hold my keyboard and watch this! 🙃
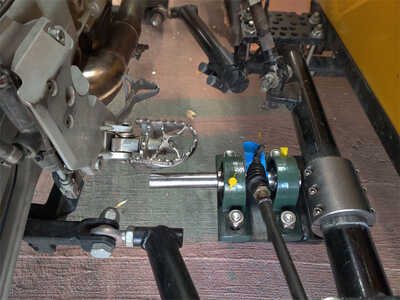
Finally getting back to the sidecar brake project. Welded the clamp to the bracket plate today. Not much work, but forward progress is... forward progress. 🙂
Hold my keyboard and watch this! 🙃
- 29 Forums
- 11.8 K Topics
- 92.4 K Posts
- 7 Online
- 5,526 Members
