hope to get back on it this weekend and finish sanding the sidecar down, I want to get it painted before I start installing the frame.
I'll get some pictures while I have everything out of the garage
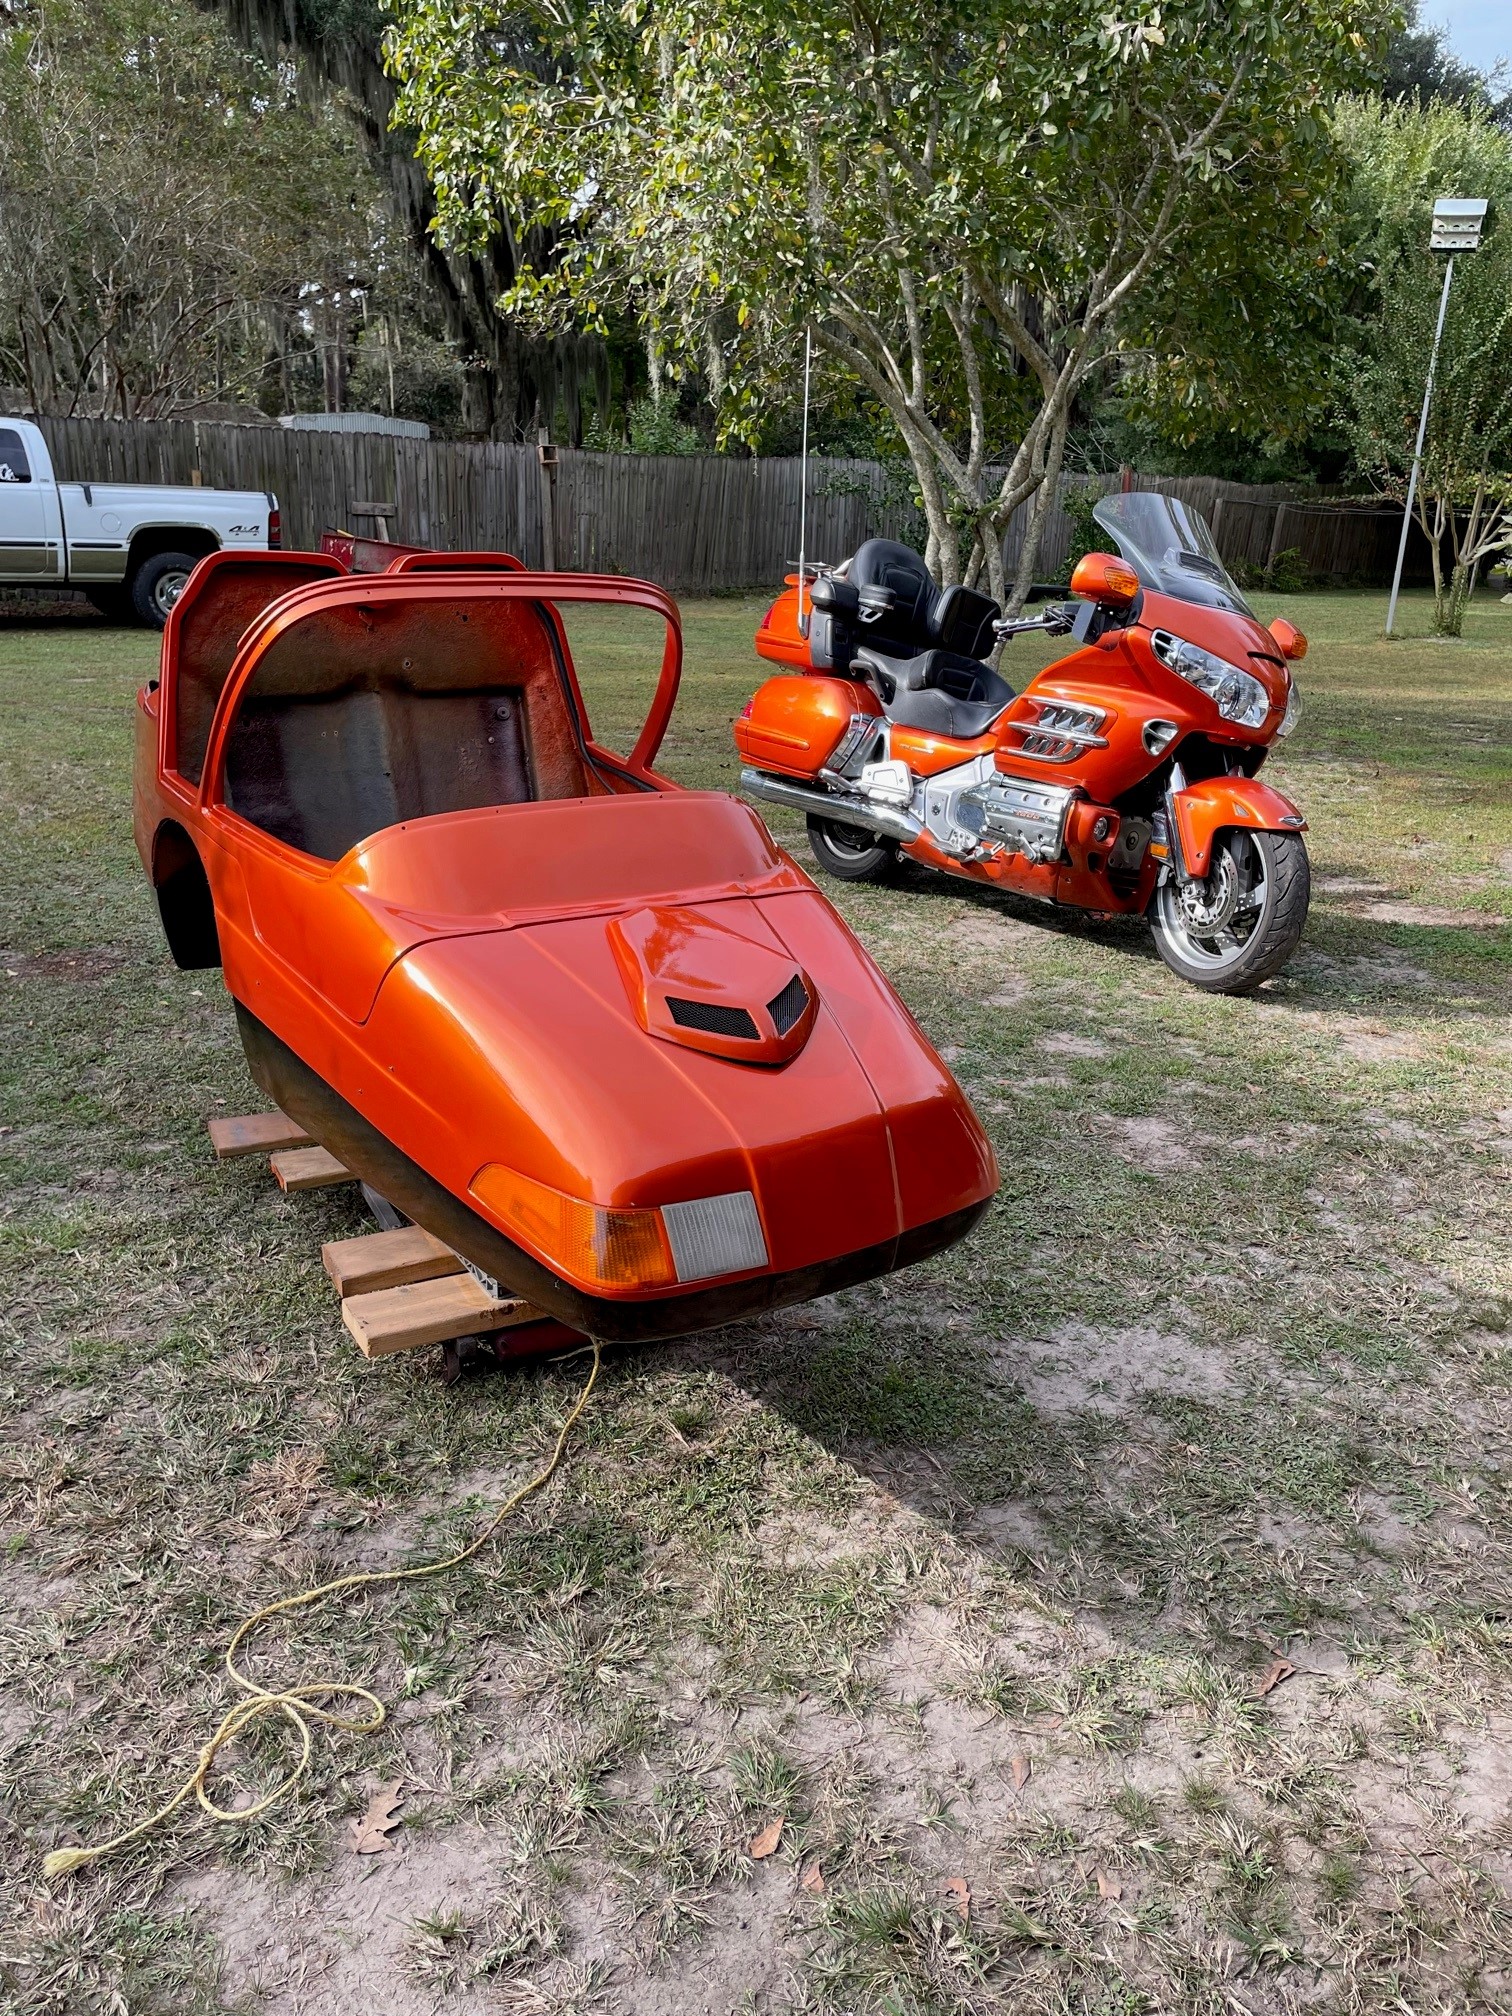
I did get to put a little time in the sidecar this weekend, I managed to get the rest of the body sanded down, well except for the bottom section, still debating on whether I want to take it down smooth or leave it like it is. I taped the hood scoop and rear spoiler on just to give an idea of where I'm going, also the front air dam is just being held up by a jack, it would be more forward and will be blended into the body If I decide to use it. it's weird in the picture the hood scoop looks huge and out of place but in person it looks fine.


made a little more progress this weekend, I got all the glass work completed and sanded up to 22o wet sand of everything. I got he holes drilled for the spoiler to mount on the trunk lid. I got the hole cut and the valve installed to allow fresh air into the cab, I added a small collar to prevent water from being able to get into the cab if riding in the rain with the vent open


1 more step closer, managed to get 2 full days working on the sidecar this weekend. got it primed and the basecoat painted Saturday
was able to get all the clear coat sprayed Sunday.


Sure looks good, who's paint did you use.
Thanks, I'm pretty pleased with the results. it's been a good 5 years or more since I have painted anything so I was pretty nervous to take on the job. I wanted to farm it out but not one paint shop in our area would touch it. I wanted to use PPG but they wanted 400 per QT. I went with Color rite and I'm glad I did, they have the paint per the paint code and the match is fantastic.
still chipping away at it. I got the new seal installed around the main hatch, got the carpet glued back in place. here is another shot
I'll get more recent pics added soon as I have more done since this one was taken. I am almost done with the frame, added the extension so it will work with the Goldwing and I'm almost done building my tilt trim bracket. I have to admit I sure wish I could have found one to buy, been a little trial and error with fabricating it myself.

That is looking sharp. Hopefully we see it in person next summer at the rally?
so I have finished the build of the bracket/mount for the tilt trim and adding the extension to the frame, I wired up a couple relays and hooked it up to do a test run and I am happy to report everything works perfect. so now I can take it back home and paint the new extension to the frame and all the brackets for the trim motor
Now I need to get off my tail and start installing the subframe on the bike so I can marry these two
I took advantage of having a few days off and got the bike subframe mounted, that was fun. I started working on getting things ready to start connecting the car to the bike and realized I had left a couple very critical parts at work so had to stop on that. I went back to getting the stuff on the car done. I managed to get the chrome trim installed and got the dash covered. I'm installing marine grade vinyl on the dash rather than just leaving it painted. I installed the new seal for the trunk.
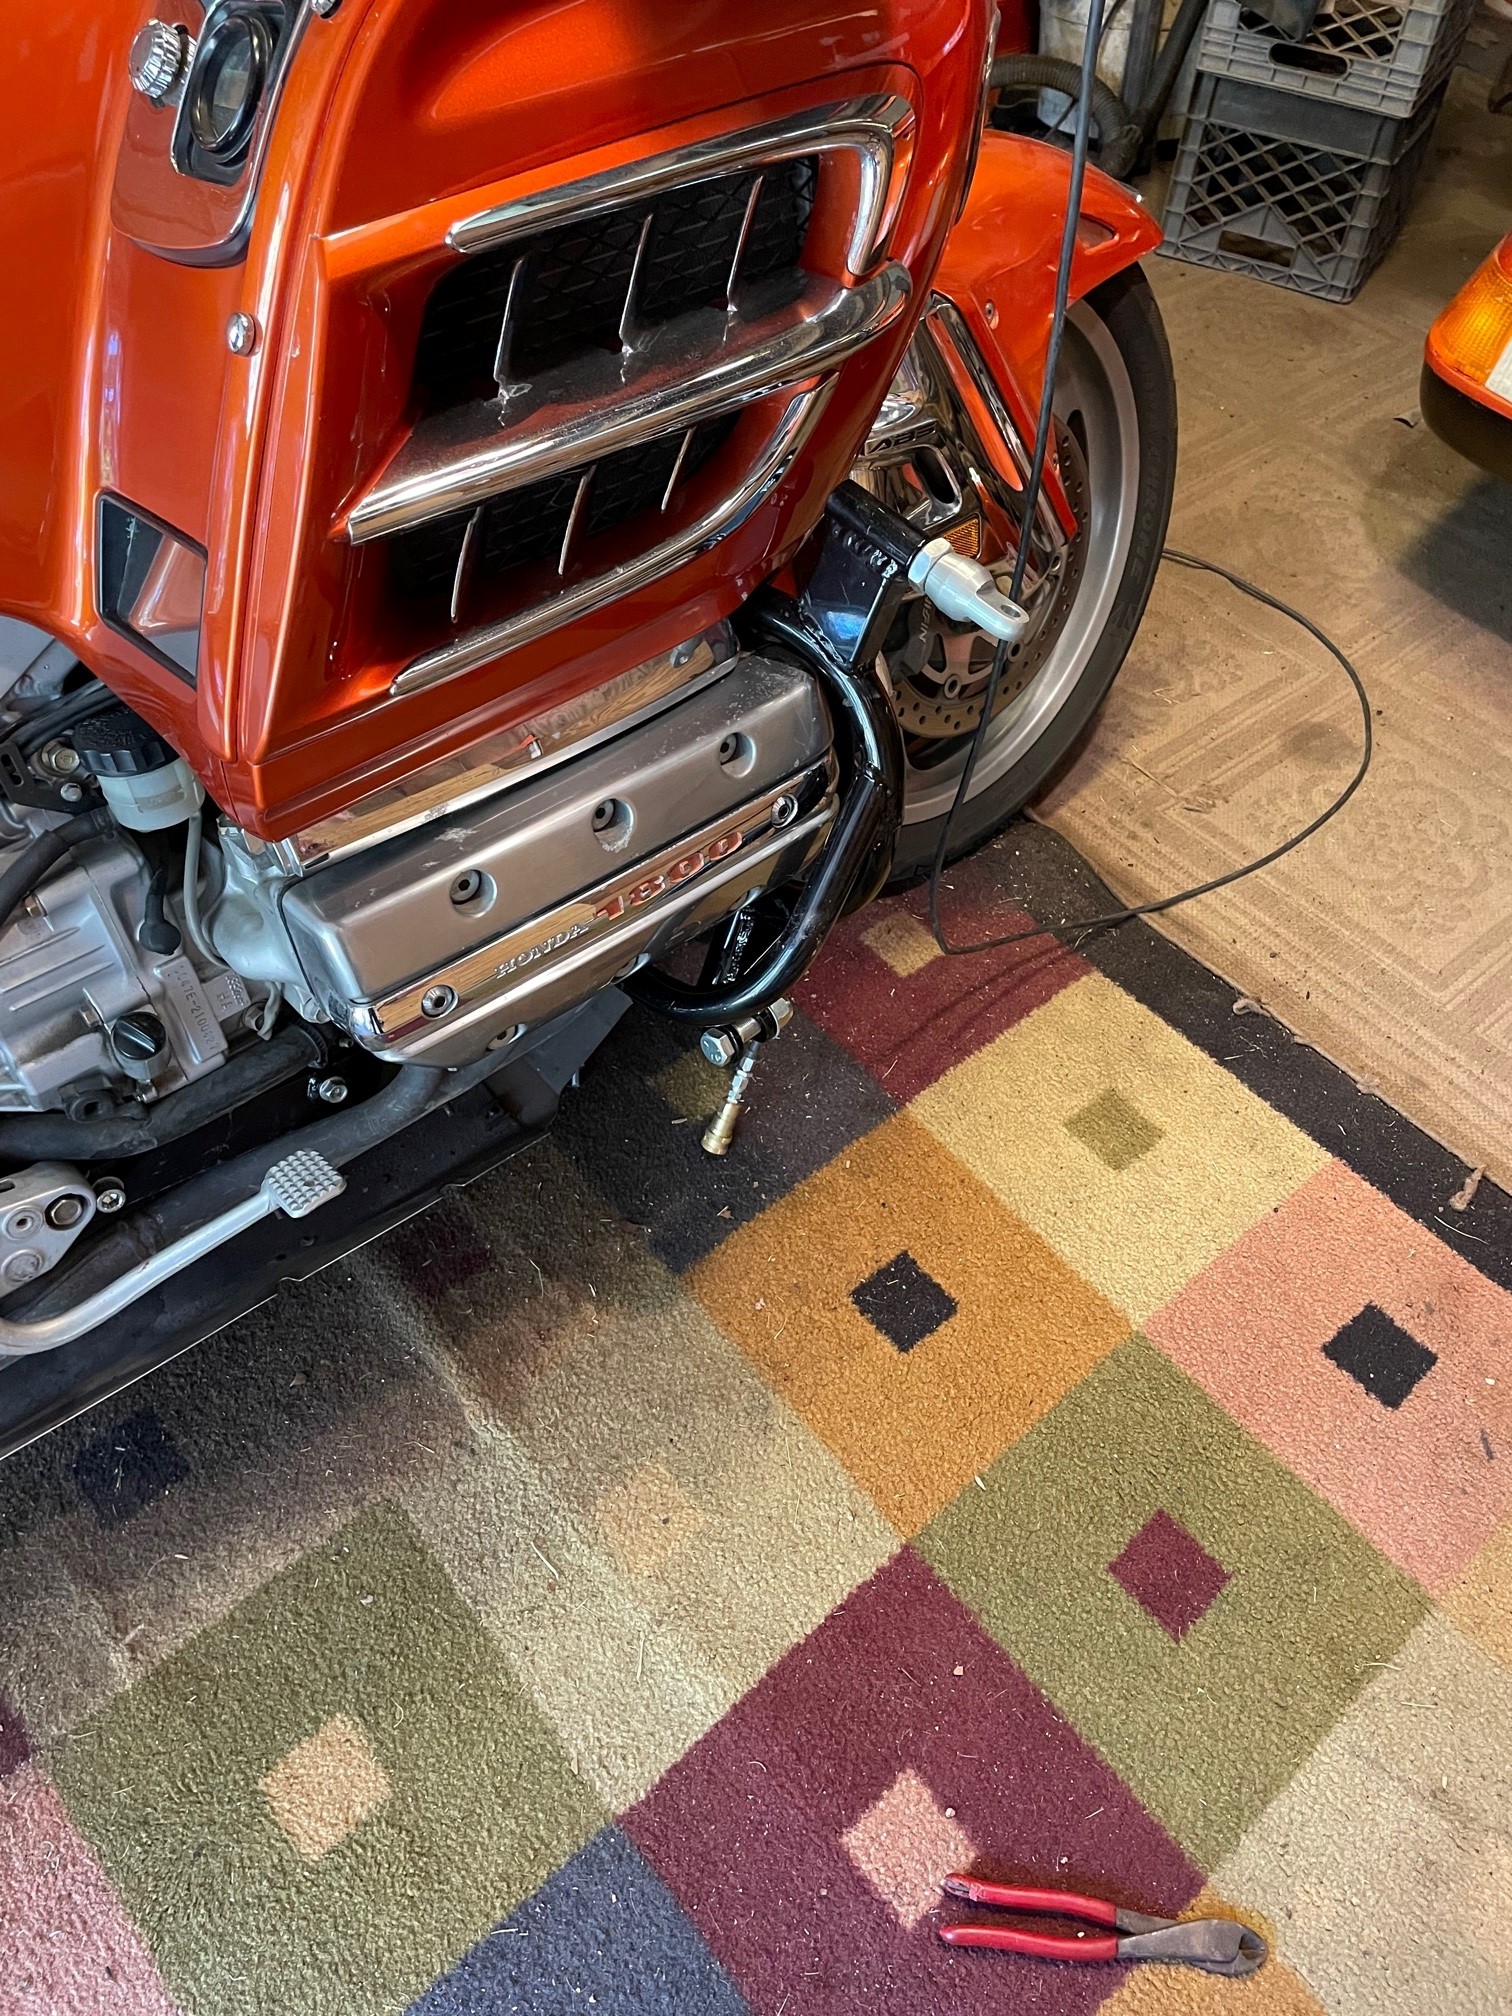
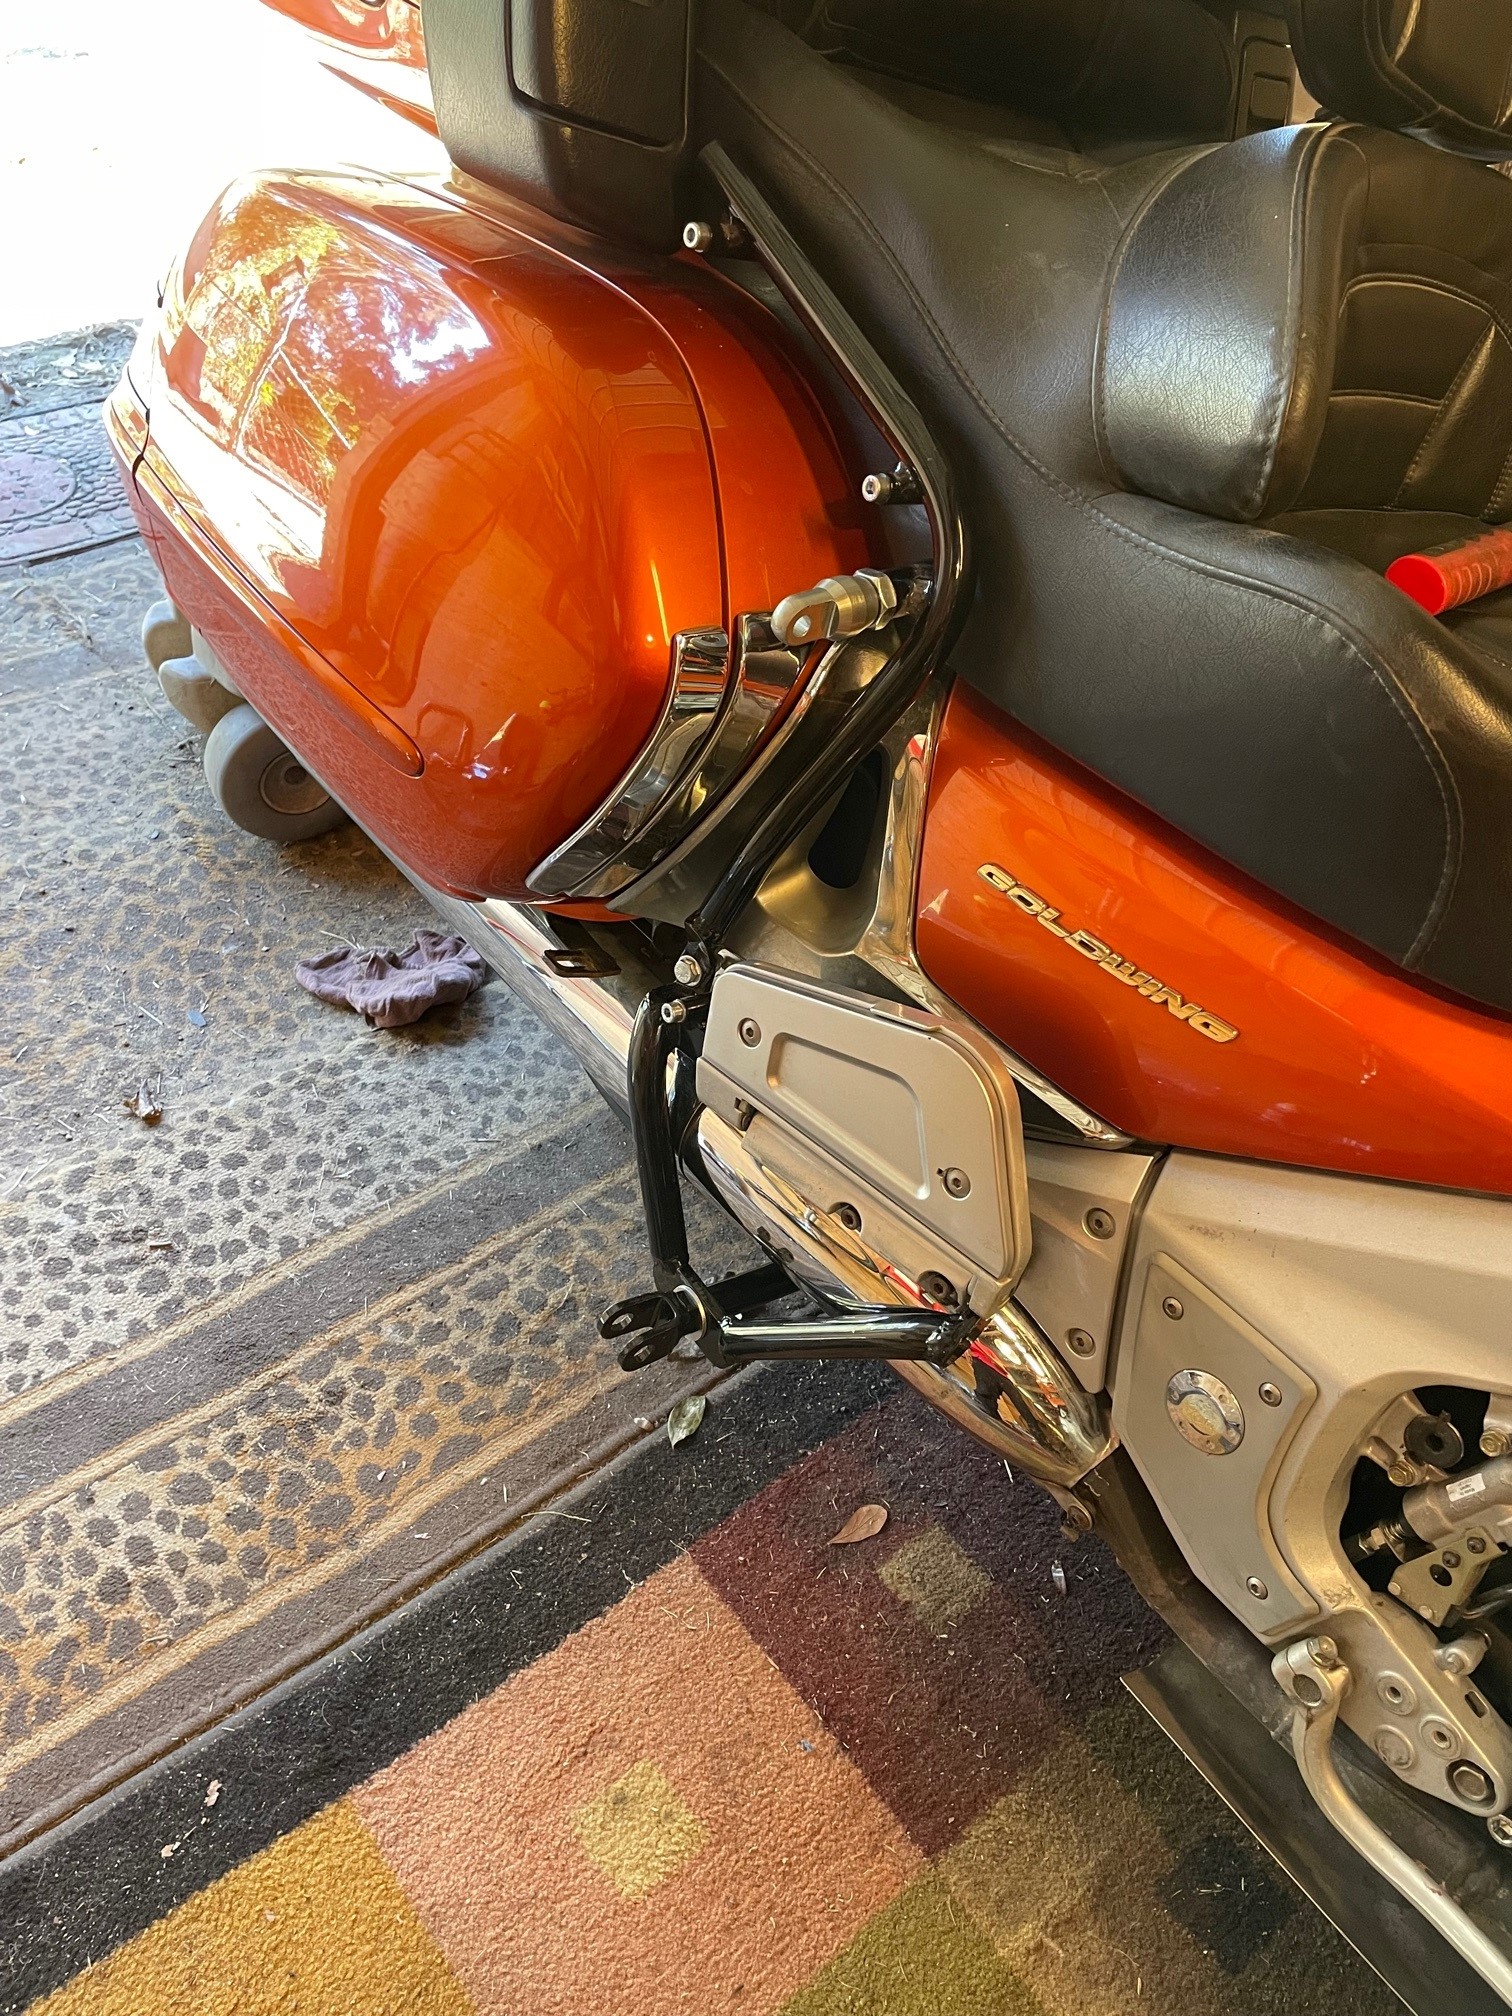
managed to get a little more time to start attaching the SC frame to the bike, sort of hit a snag or 2 so I need to ask those with far more knowledge than me to chime in here and let me know if this looks OK
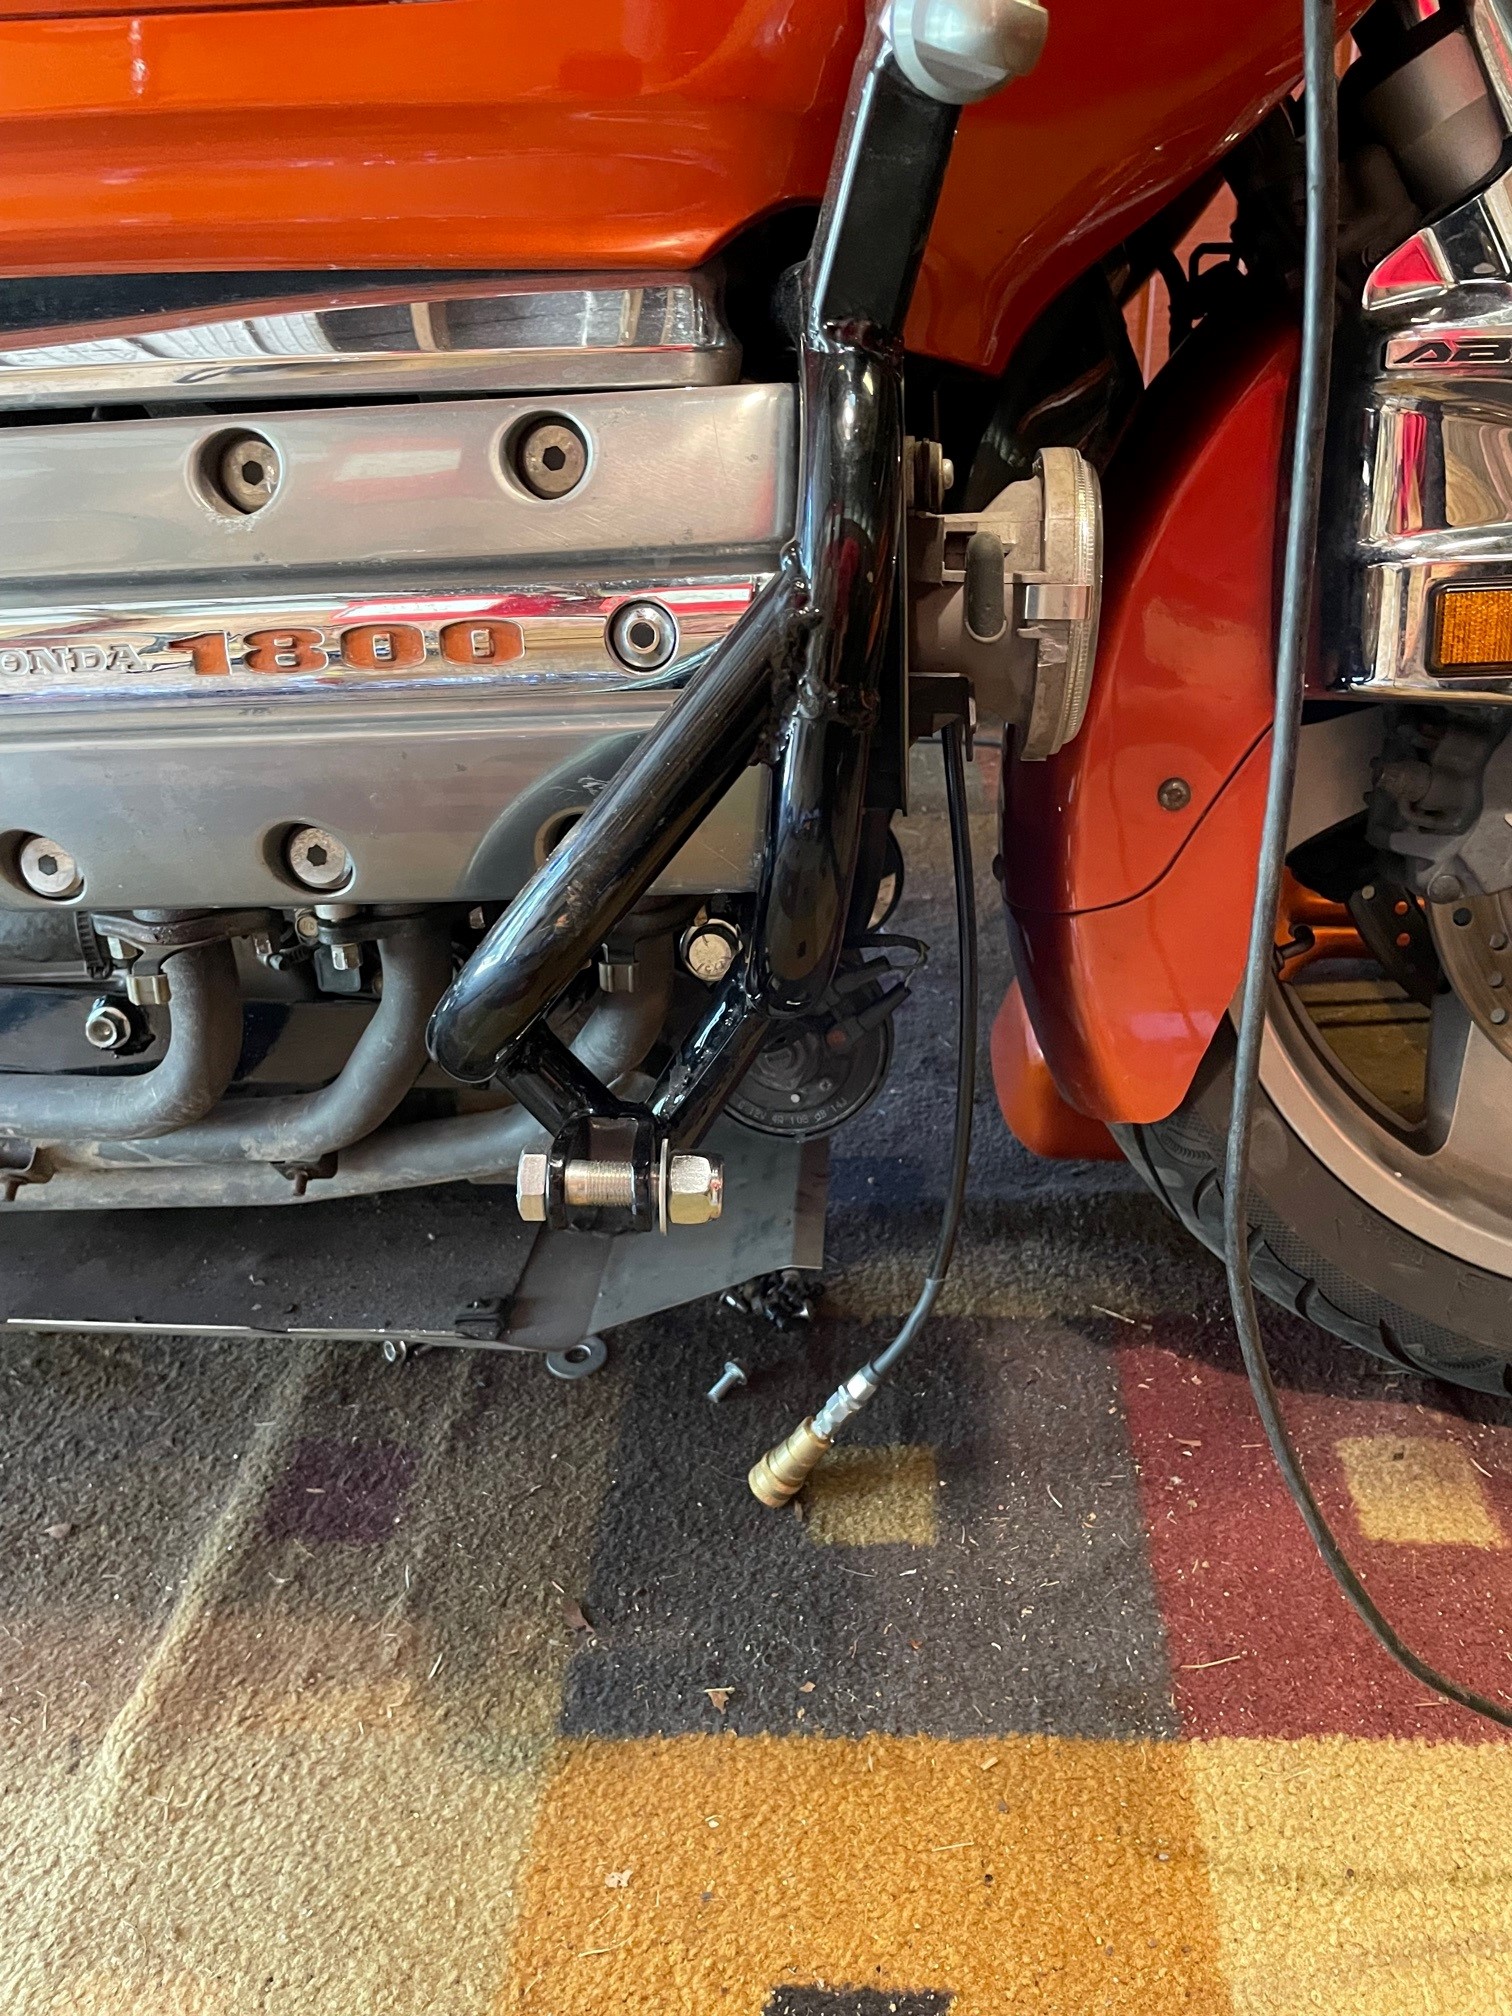
my main issue is the front mounts, as you can see in the pic my connecting arm just barely reaches, it is fully inserted and flush with the back of the arm on the frame itself but as you can see it is stretched out to it's limit, the rear one is all the way in. the lead on the car tire is pretty close so I don't think I can go forward much if at all. also I had to use the front extended arm for the lower mount, I figured that one needed to be used for the front top mount. I'm thinking that won't be an issue though. I guess what I'm asking is does the front lower look like it would be OK if that is how I have to leave it and if not,,, any ideas

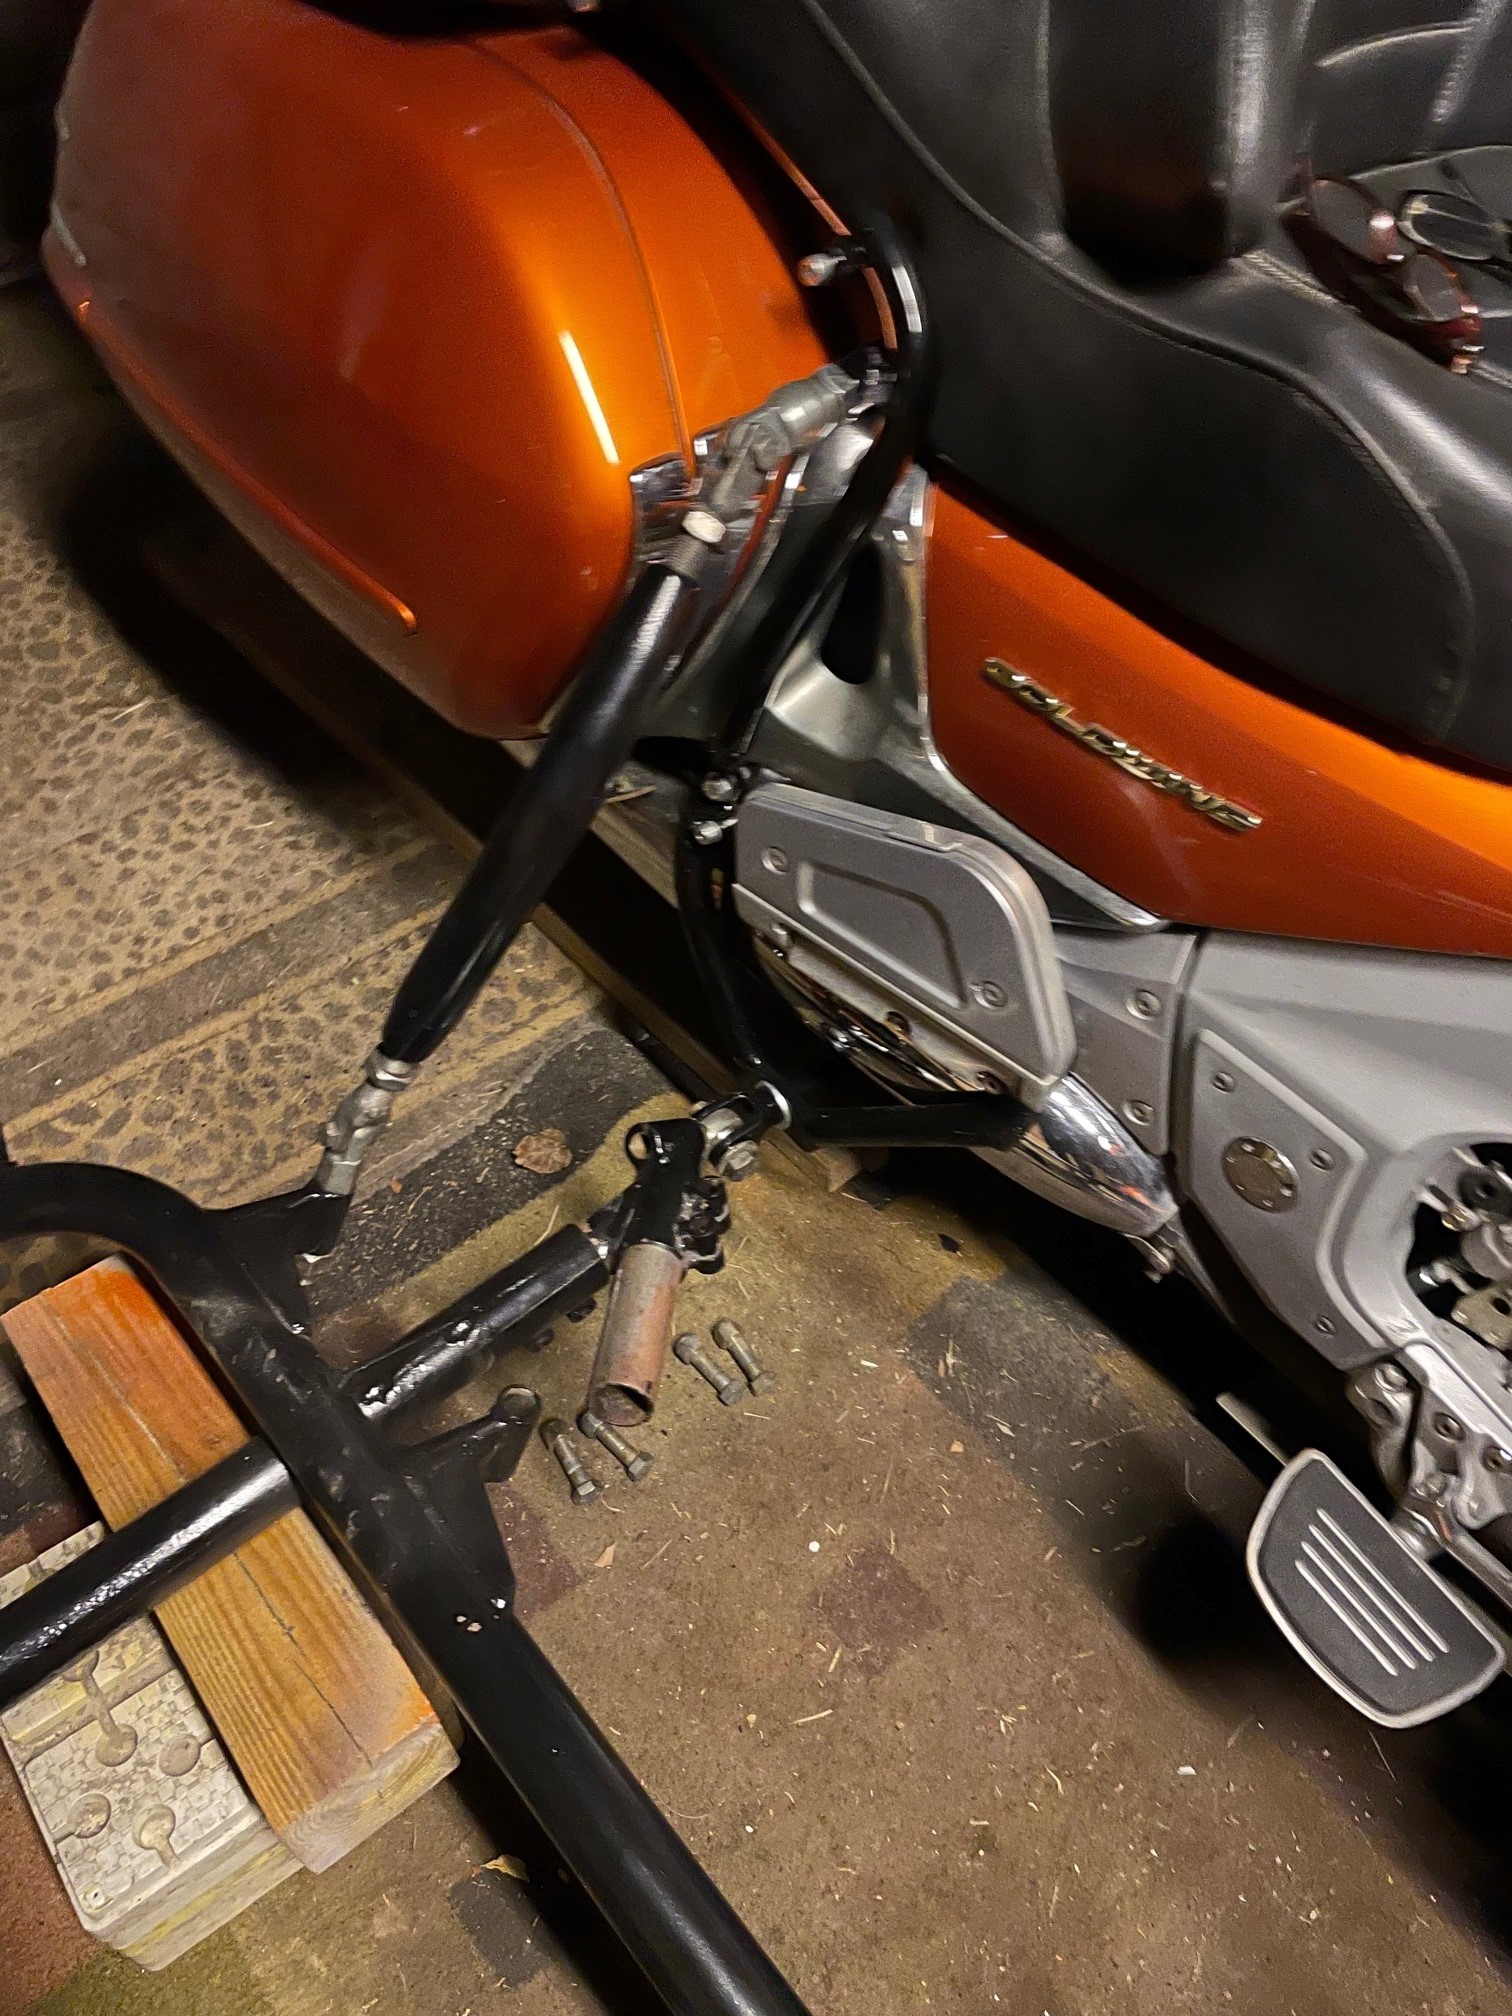

As long as you have full contact in the pinch clamps, having tubing sticking out the other end does nothing for you.
As you noted in your phone call the angles of the hiem joints are off. Not a safety issue at all. The reason we like to have the hiem joints level with the ground is when you align the sidecar you can get it close with the slip joints then fine tune by threading the hiem joints in or out. With the joints not level as you thread in and out you also raise or lower the sidecar a bit.
Jay G
DMC sidecars
Monday - Thursday 6-4:30 GMT-8
15616 Carbonado South Prairie RD
Buckley WA 98321
www.dmcsidecars.com
https://www.facebook.com/dmcsidecars
866-638-1793
Starting to look good, but I have to say the front mount being extended all the way out wouldn't fly here.
well I got a good bit done over the holidays, not worth new pictures yet but getting SO close now. I got it all dialed in and aligned, figure I'll ride it around the neighborhood and recheck it before I feel it's ready to put the car on. got 95 % of the wiring done on the bike for the connection to the car. hit one snag with the brakes, I went to connect the new brake line from the bike to the line from the car and they won't fit each other. the male end on the car is too big to go into the female coupler on the new line. got the new tire mounted on the car
got to do a little more this weekend, I am so close now. I got the brake line squared away bled it out. might have to bleed it a little more but won't really know till I ride it. I did manage to get the car on the frame and hook up the main harness. I found I hooked the spoiler brake light up the taillights so I have to change that. have to get the tilt trim hooked up and then recheck all my adjustments. once the car was on it looked high in the nose but according to the level on the frame it should have been a little nose down so I need to look into that. But the car is on and looks good. I'll get some pictures soon