
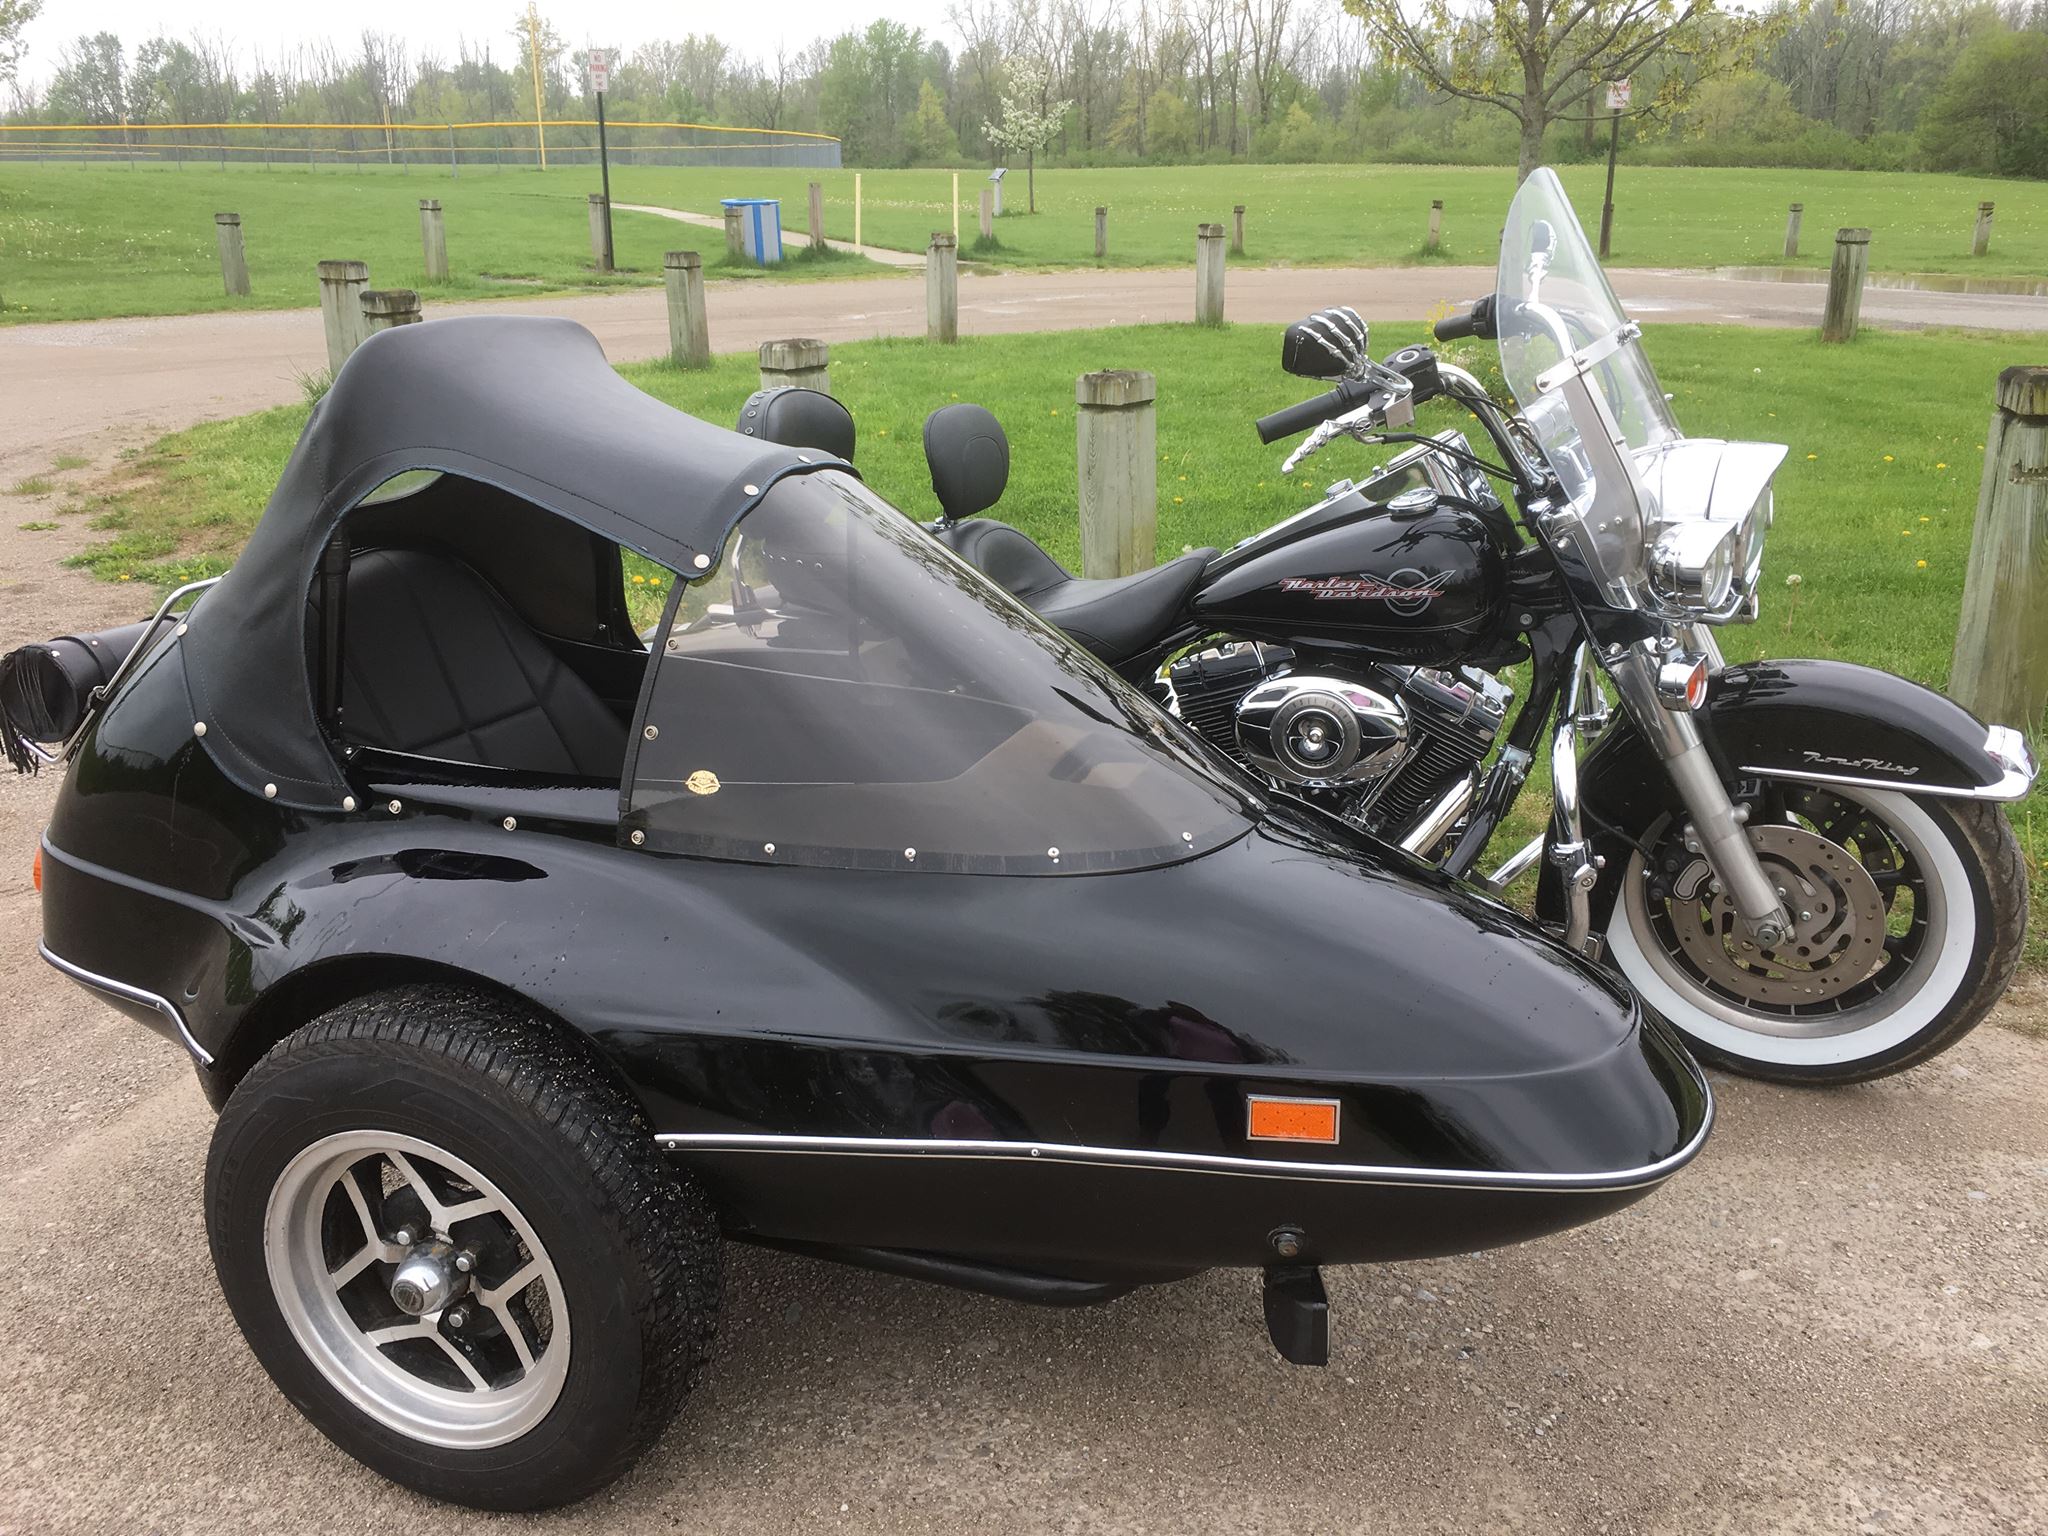
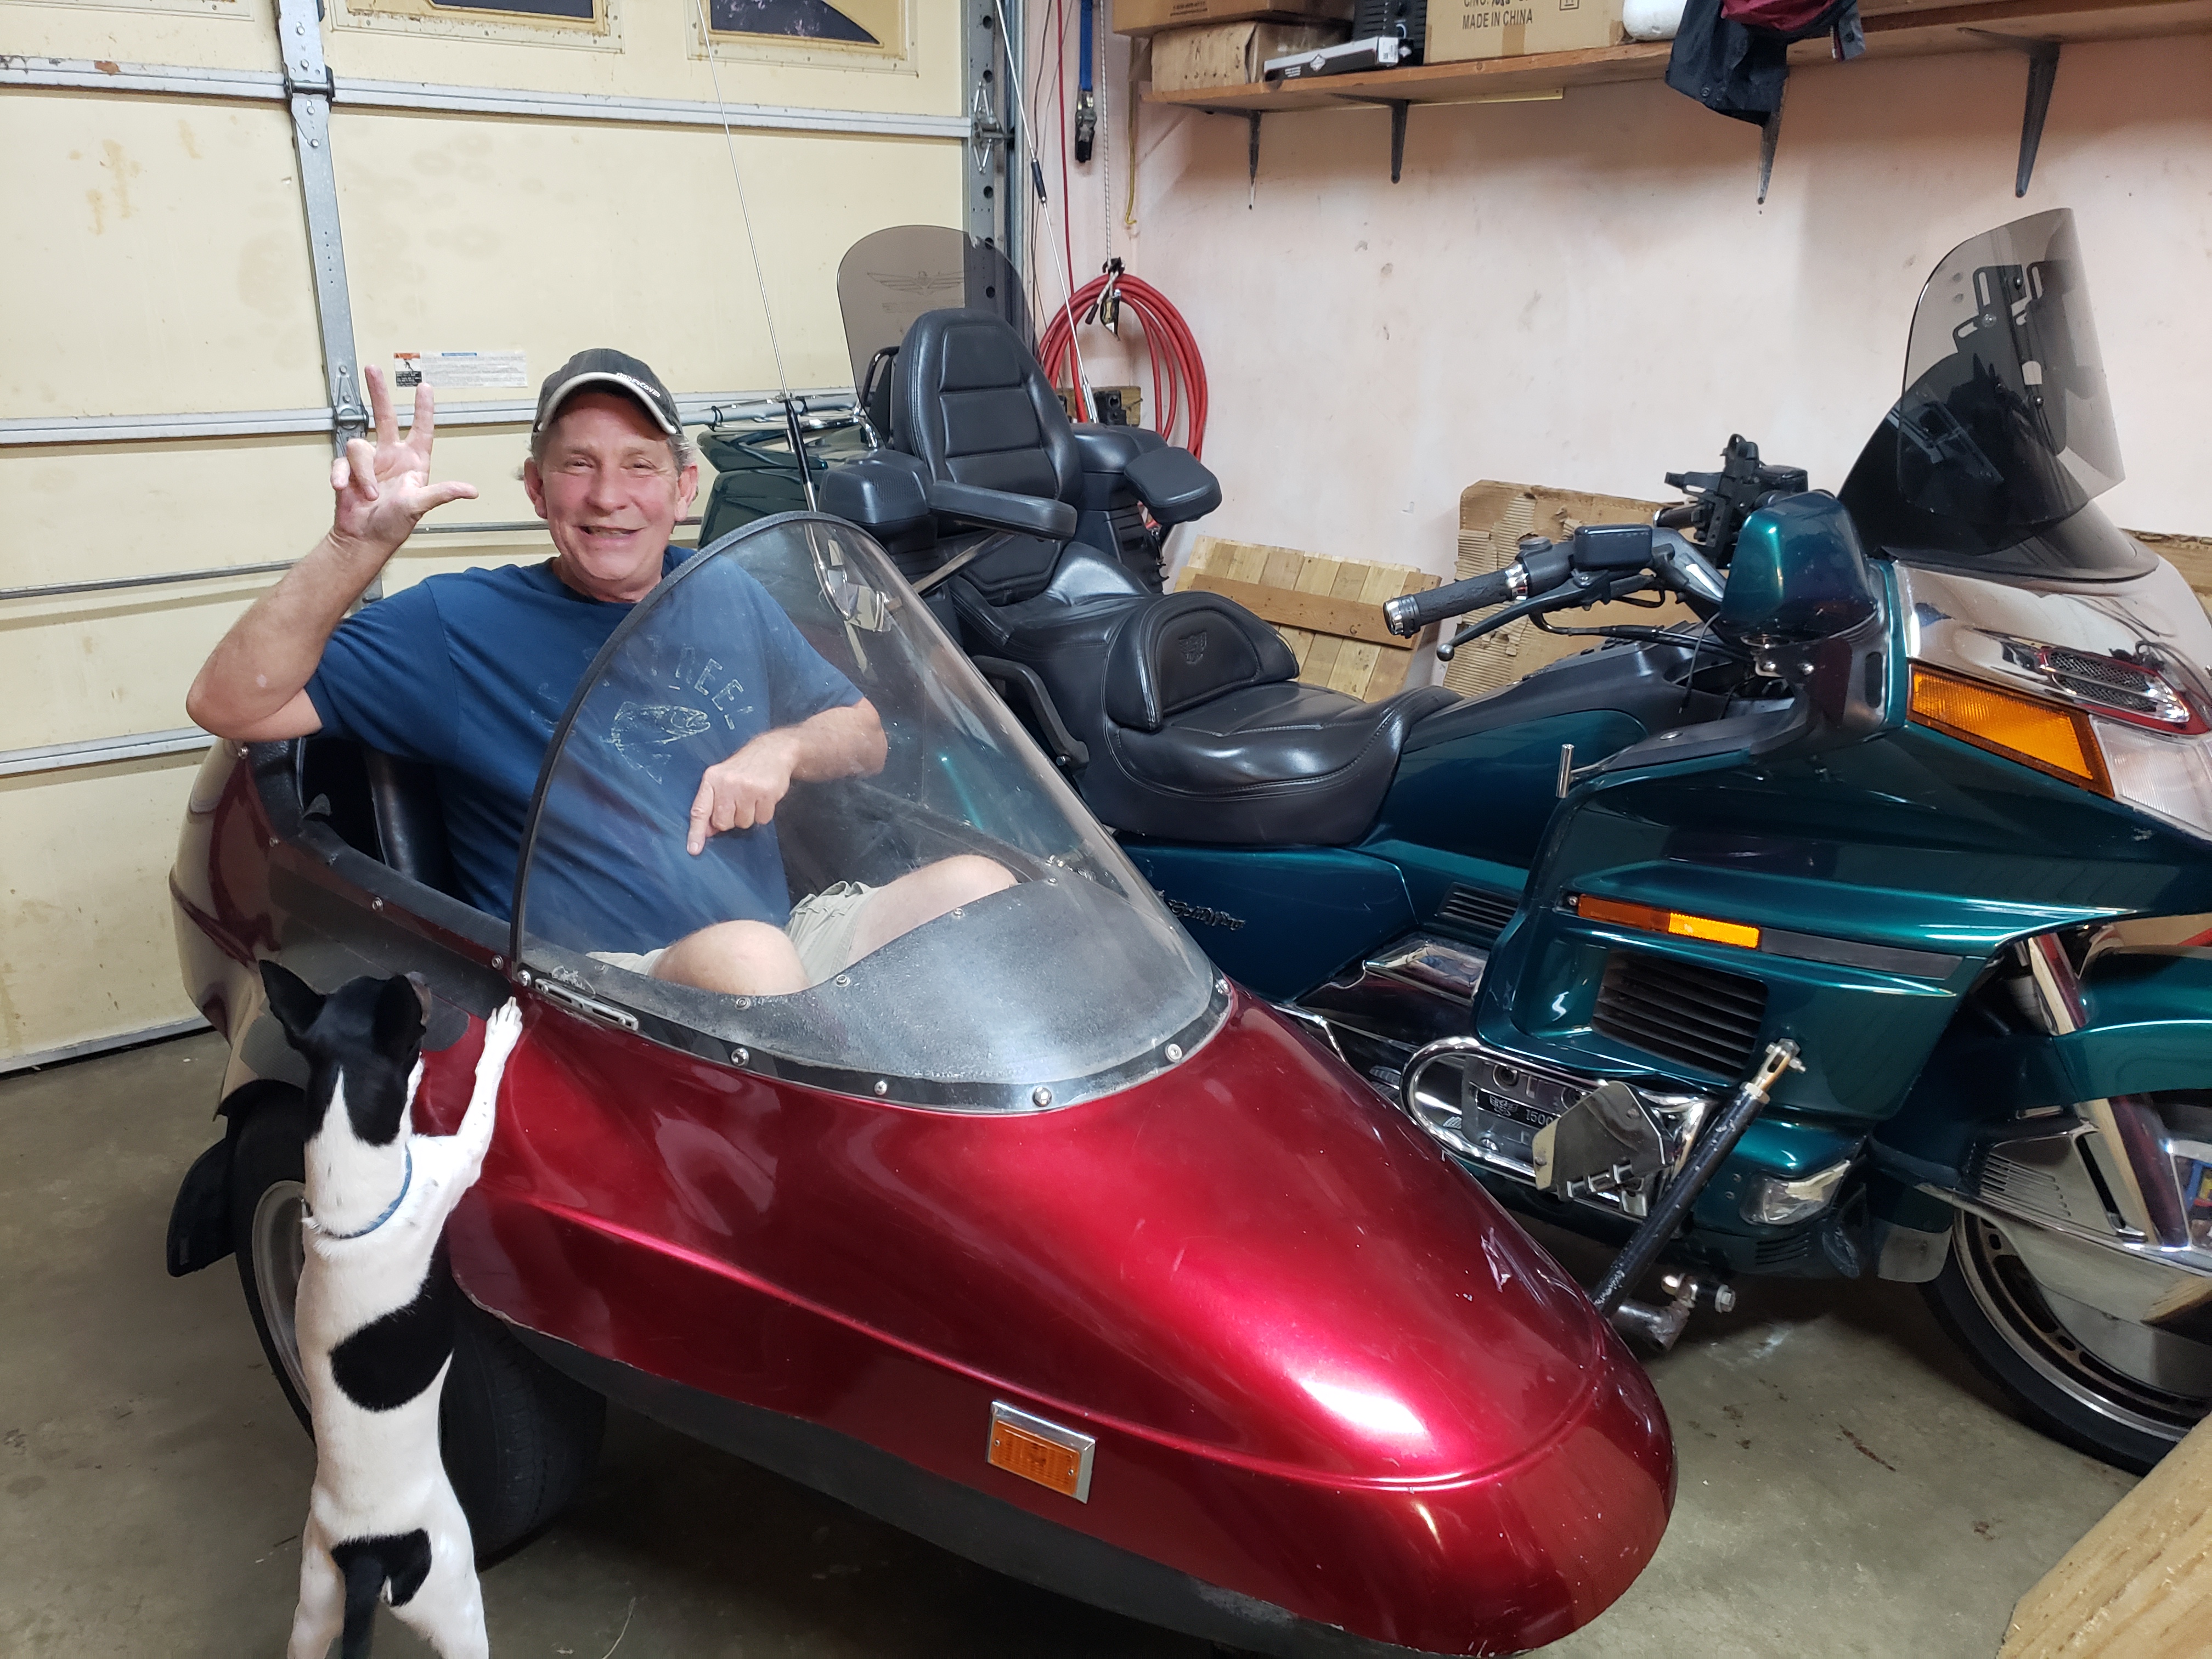
I'm going to be adding a convertible top that was gifted to my dog to keep him out of the sun. My sidecar is a 30 year old California Friendship 1. It never had a top, so there are no snaps on the windshield.
I've talked to 2 different sidecar company's, Gustuef windshields, and a marine supply place that puts them on their boats. I've got 4 different methods,,,lol.
I'm kinda worried about my 30 year old windshield cracking even using a proper drill bit. I have found some self adhesive snaps that the marine supply sell. If they hold, they will be perfect. If they don't hold they will at least be in place long enough for me to drill a hole through it the fasten how ever I choose.
Just wondering what you guys have done. Thanks
Here I come, to save the day, it's FlyingMonkeys, on his way.....
Sidecar Willie, please bark these instructions to your caretaker:
Yes, they do make specialty drill bits designed for drilling into or through acrylics, Lexan said, plastics, etc. However you can also use a drill bit designed for drilling wood.....versus one designed for drilling metals.
Once you have CAREFULLY located PRECISELY where you want to place each snap receiver (female half of the snap) then drill a pilot hole 1/2 way through a 1" thick piece of wood. Then clamp that 1" piece of wood onto the outside of the windshield, with a matching 1" piece of wood on inside of the windshield, so that the windshield is sandwiched between the two pieces of wood. That pilot hole that is 1/2 way through the outer piece of wood should be located directly over the place that you want to drill a hole THROUGH.
Now, using a wood drill bit, drill all the way through that pilot hole, through the windshield, and into the wood on the other side of the windshield.
The drill bit will carve through that windshield pretty easily, so do NOT use much pressure, just ease the drill bit through the windshield, and into the wood on the other side.
If successful, do this same process for every hole you want to install snaps at.
If unsuccessful.....give Sidecar Willie a treat.....then have a new windshield made by a local boat supply company, because Florida Sidecar Products only has windshields for the Friendship ll......not the Friendship l.
Two Million Mile Rider
Exploring the World in Comfort
I was actually wondering weather to use pop rivets, nylon screws, stainless steel screws. what size drill bit, that type of thing. I got 4 different methods., plus the stick on snaps.
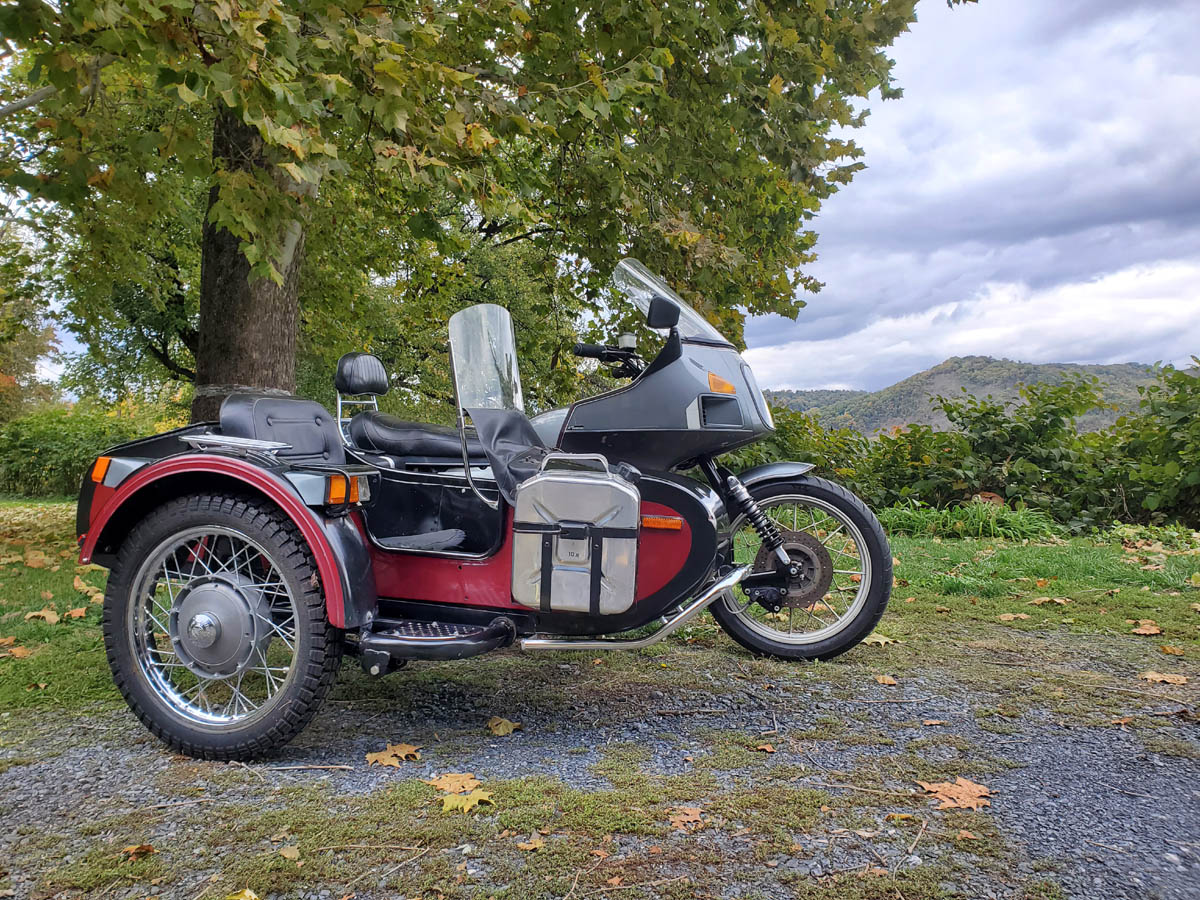
Here's a windshield that's currently available for my hack. I think it looks great with the top. And that dark tint wiould match the windshield on my wing.
But a new windshield is so far off it aint even funny. Mucho stuff to get right before that.
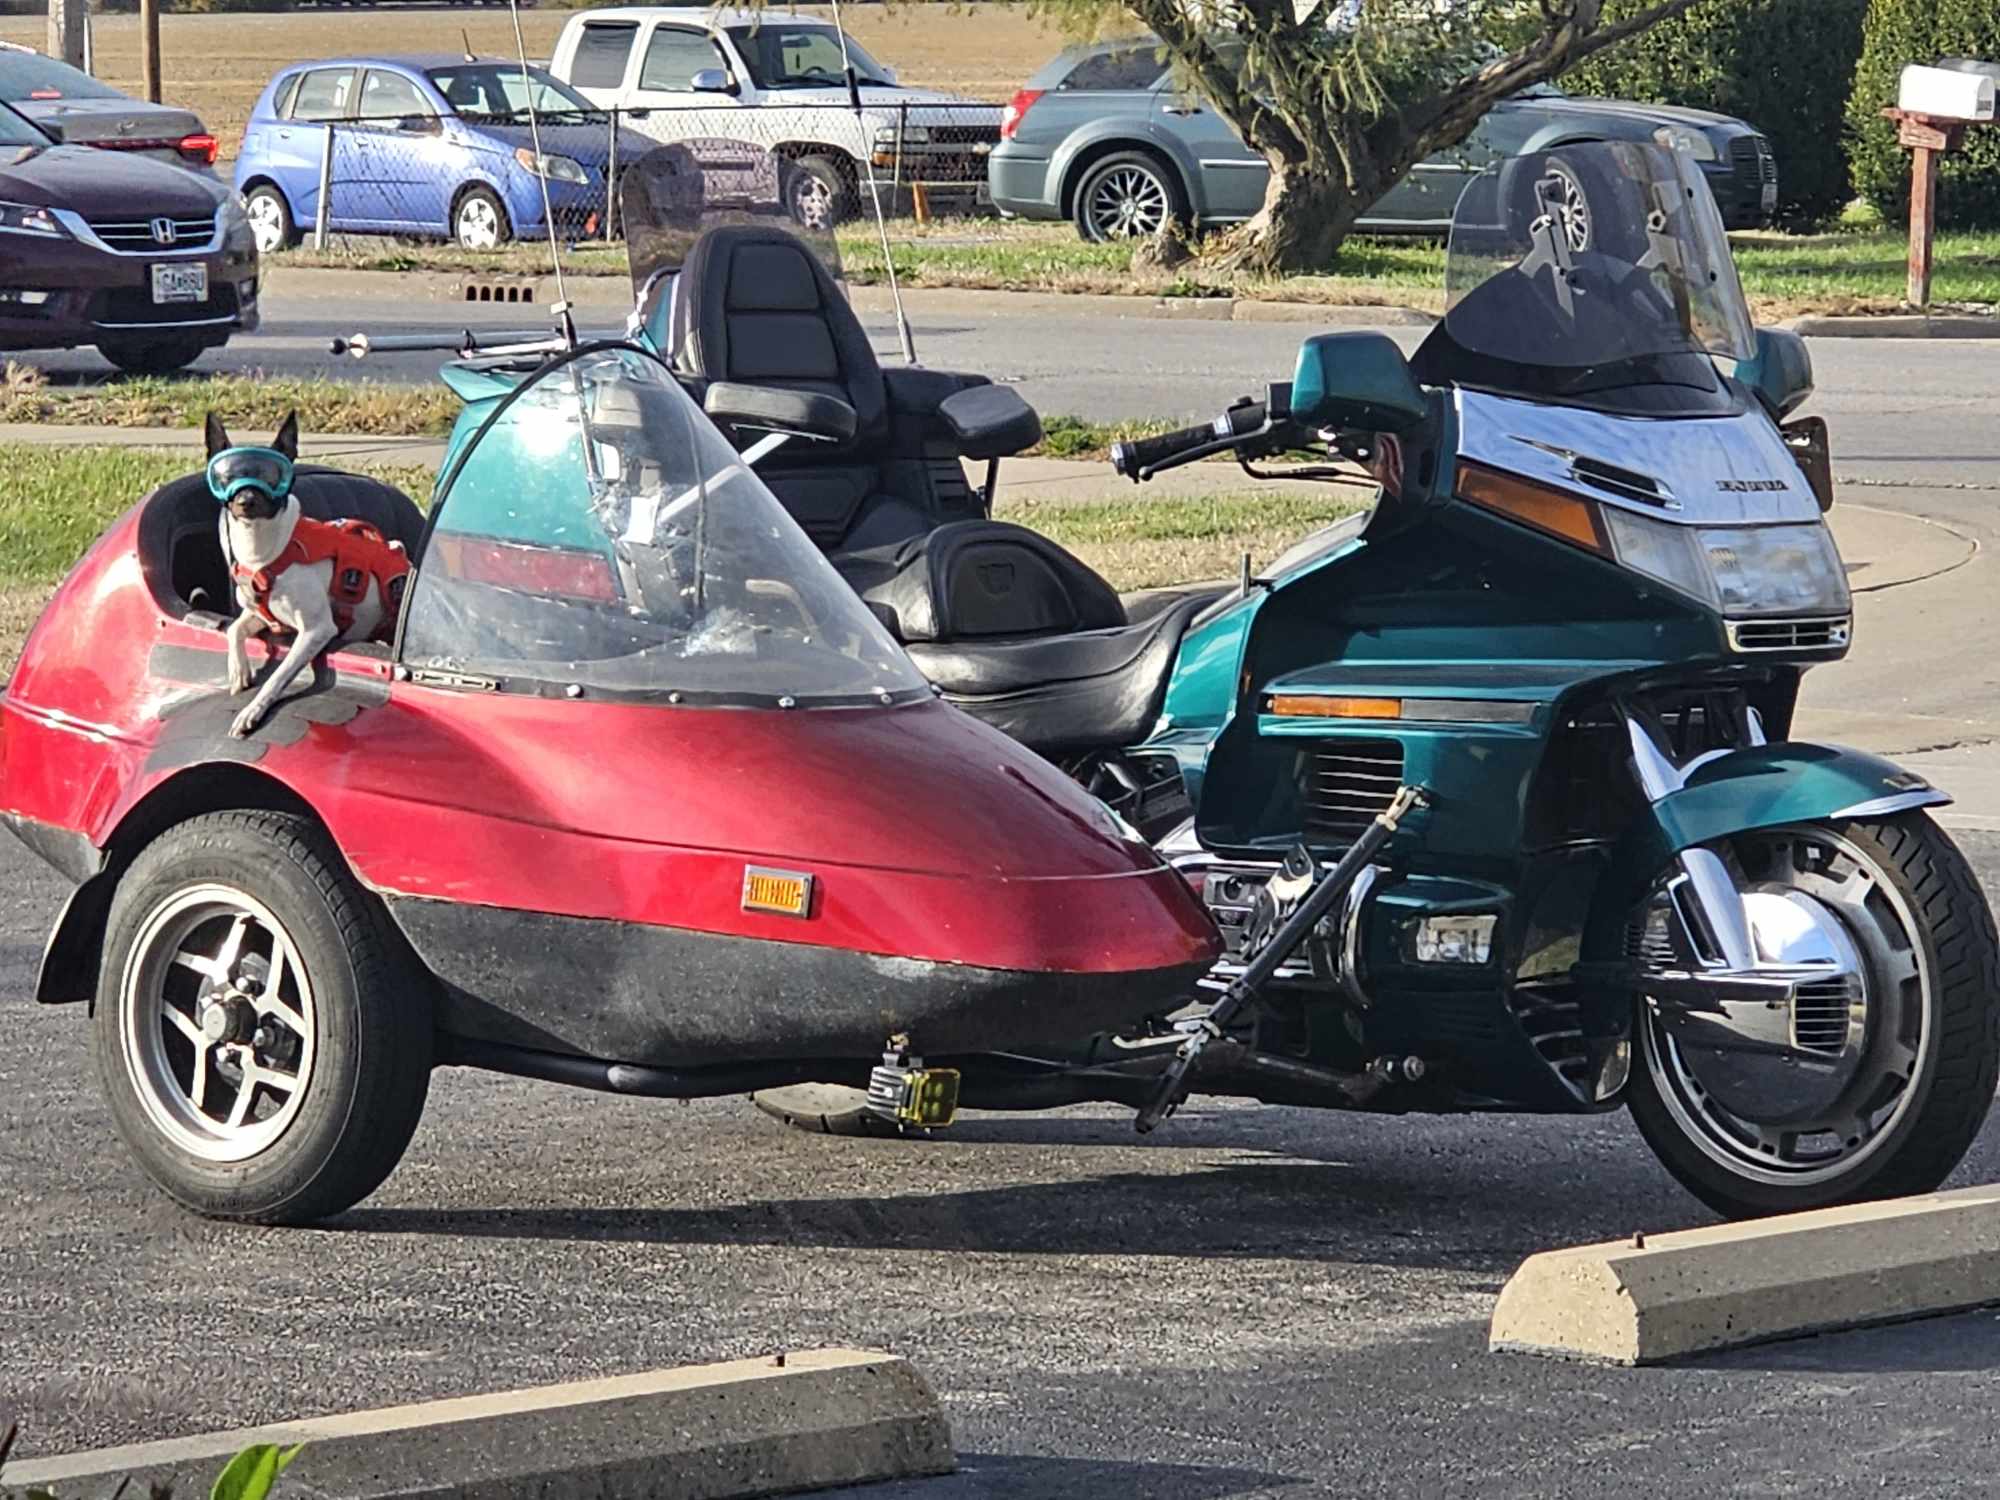
The black bike has the windshield I want. And of course you guys have seen my mis-matched combo,,,lol.
Oh ya. Is that the under dog theme song,,,,lol?
You worry too much about the mismatched color. I think it looks fine.
Just keep buying Willie accessories that match the bike and call it done.
Or you can do like I did and paint a small piece of the sidecar a similar color and claim it was intentional. Note the turn signals.

Given the age of the windshield, I don't think rivets of any sort will be to your liking. I had to remove the lexan cover on the headlight on my Hannigan to do some cleanup and re-sealing. Even putting the legacy screws back in place did some sketchy things to it so I can't imagine how a 30 year old curved piece of acrylic will take any abuse without falling to pieces.
FM's advice is quite sound and least likely to cause further damage.
As for adhesive, given the stresses on the snaps, there does not exist (at least to mere mortals not employed by NASA, Boeing or Lockheed Martin) an adhesive capable of handling those stresses.
Illegitemi non carborundum est!
Cal, Caretaker of Sidecar Willie, I do have a question:
Are you ever going to be taking hominid passengers IN the sidecar, or is the sidecar solely for us by Sidecar Willie ???
I ask because....if it were only going to be used by Sidecar Willie, Sir Wilton, from the House of Calvin, then I would buy a medium grey tinted SPORT windshield from Gustafsson, and then have a new tonneau cover made that went from the top of the new SPORT windshield, to the top of the back of the sidecar, so the new tonneau cover would be relatively flat, blah, blah, blah.
DO what you are planning to do now......but "IF" you have major destructive failure of the current windshield, let's talk.
And, I agree with Drew @andrew-baker, the differentiation of the colors of the bike and sidecar are not that big of deal. In fact...it is "christmasy"
If you insist on changing the color of the sidecar to match the bike, simply have a local WRAP shop install a vinyl wrap on the sidecar, to match the bike. Much less money, and less disassembly.
Two Million Mile Rider
Exploring the World in Comfort

QC, with the curve and age of that windshield, drilling numerous holes for snaps could be risky.
Here is an idea: consider one snap on the windshield at each corner of the cover, a long strip of heavy duty velcro between the two snaps to hold the cover tight. Might have to sew the velcro to the cover.
Don't use the velcro that has felt on one side and plastic nubs 0n the other. Get the heavy duty that has plastic nubs on both side. Same type that is sold with plexiglass headlight protectors.
Problem solved!! I can add a splash of matching bike color at the same time. This stuff is NASCAR tape refereed to 200 mph tape, so it should hold the top to the windshield.
I'm joking of course,,,lol. More on the way.
Quote from FlyingMonkeys on December 8, 2023, 9:06 amCal, Caretaker of Sidecar Willie, I do have a question:
Are you ever going to be taking hominid passengers IN the sidecar, or is the sidecar solely for us by Sidecar Willie ???
I ask because....if it were only going to be used by Sidecar Willie, Sir Wilton, from the House of Calvin, then I would buy a medium grey tinted SPORT windshield from Gustafsson, and then have a new tonneau cover made that went from the top of the new SPORT windshield, to the top of the back of the sidecar, so the new tonneau cover would be relatively flat, blah, blah, blah.
DO what you are planning to do now......but "IF" you have major destructive failure of the current windshield, let's talk.
And, I agree with Drew @andrew-baker, the differentiation of the colors of the bike and sidecar are not that big of deal. In fact...it is "christmasy"
If you insist on changing the color of the sidecar to match the bike, simply have a local WRAP shop install a vinyl wrap on the sidecar, to match the bike. Much less money, and less disassembly.
I can't get any of my friends to ride in it,,lol. I do have an elderly lady friend who is 85. She says she'll go for a ride. But I'm worried she'd have a hard time getting in and out of it. I know I hardly couldn't get out of it,,lol. So it looks like just "Sir Wilton" for now,,,lol.
If the time would ever come for a new windshield I would get the medium grey as that's what Mad Stad calls the color of the windshield I bought for the bike.
Truthfully. The color mis-match really doesn't bother me that much. It's just one of those things I would fix if I could. I did consider some kind of wrap. But that's another long way off subject. But I really do think I could add some kind of graphic or something to make it look a bit better. But,,,,, I'm not all that worried about it right now.
This is not me in the sidecar. Just a friend trying it on for size. It's a tight fit for a 200 pound man. I mainly posted to show the color of the bikes windshield.
Oh ya. And Wilton was not happy . He said "Hey man. That's my spot",,,,lol.
Below is a link for the snaps I have coming. They recommend using a 3m primer on some applications. But I forgot to order it. It's also recommended for it to be above 70* for the adhesive to cure for 72 hours. I don't think I can even get my garage to that temp this time of year. I have a kerosene heater, but I won't be leaving it run over night unattended. That's why I thought I could just drill a hole through the snap and into the windshield, then use what ever fastener.
I do have another idea. On the Gusstoffo windshield website they have a installation video. It say to use a soldering iron and mark the center of the hole. Then drill to size. I wonder if I could just melt a hole all the way through so I don't risk a shatter? I could size my screw to the size of hole the soldering iron left? Maybe clean it up with a drill bit? Just thinking out loud,,,lol. Yah or nah on the soldering iron?
On the top that is coming. There are more snaps on the back edge of the top than there are on my sidecar. I just have a flat taunno cover for the cockpit. But there is a snap in the center of the new top and my existing cover. So I was just going to base everything off that one snap. I'll add them where ever I need to. I was just going to start in the center and work my way out. Windshield included.
Other thought's?
https://www.sailrite.com/YKK-SNAD-Clear-25mm-Adhesive-Backed-Flexible-Base-Stud

Calvin
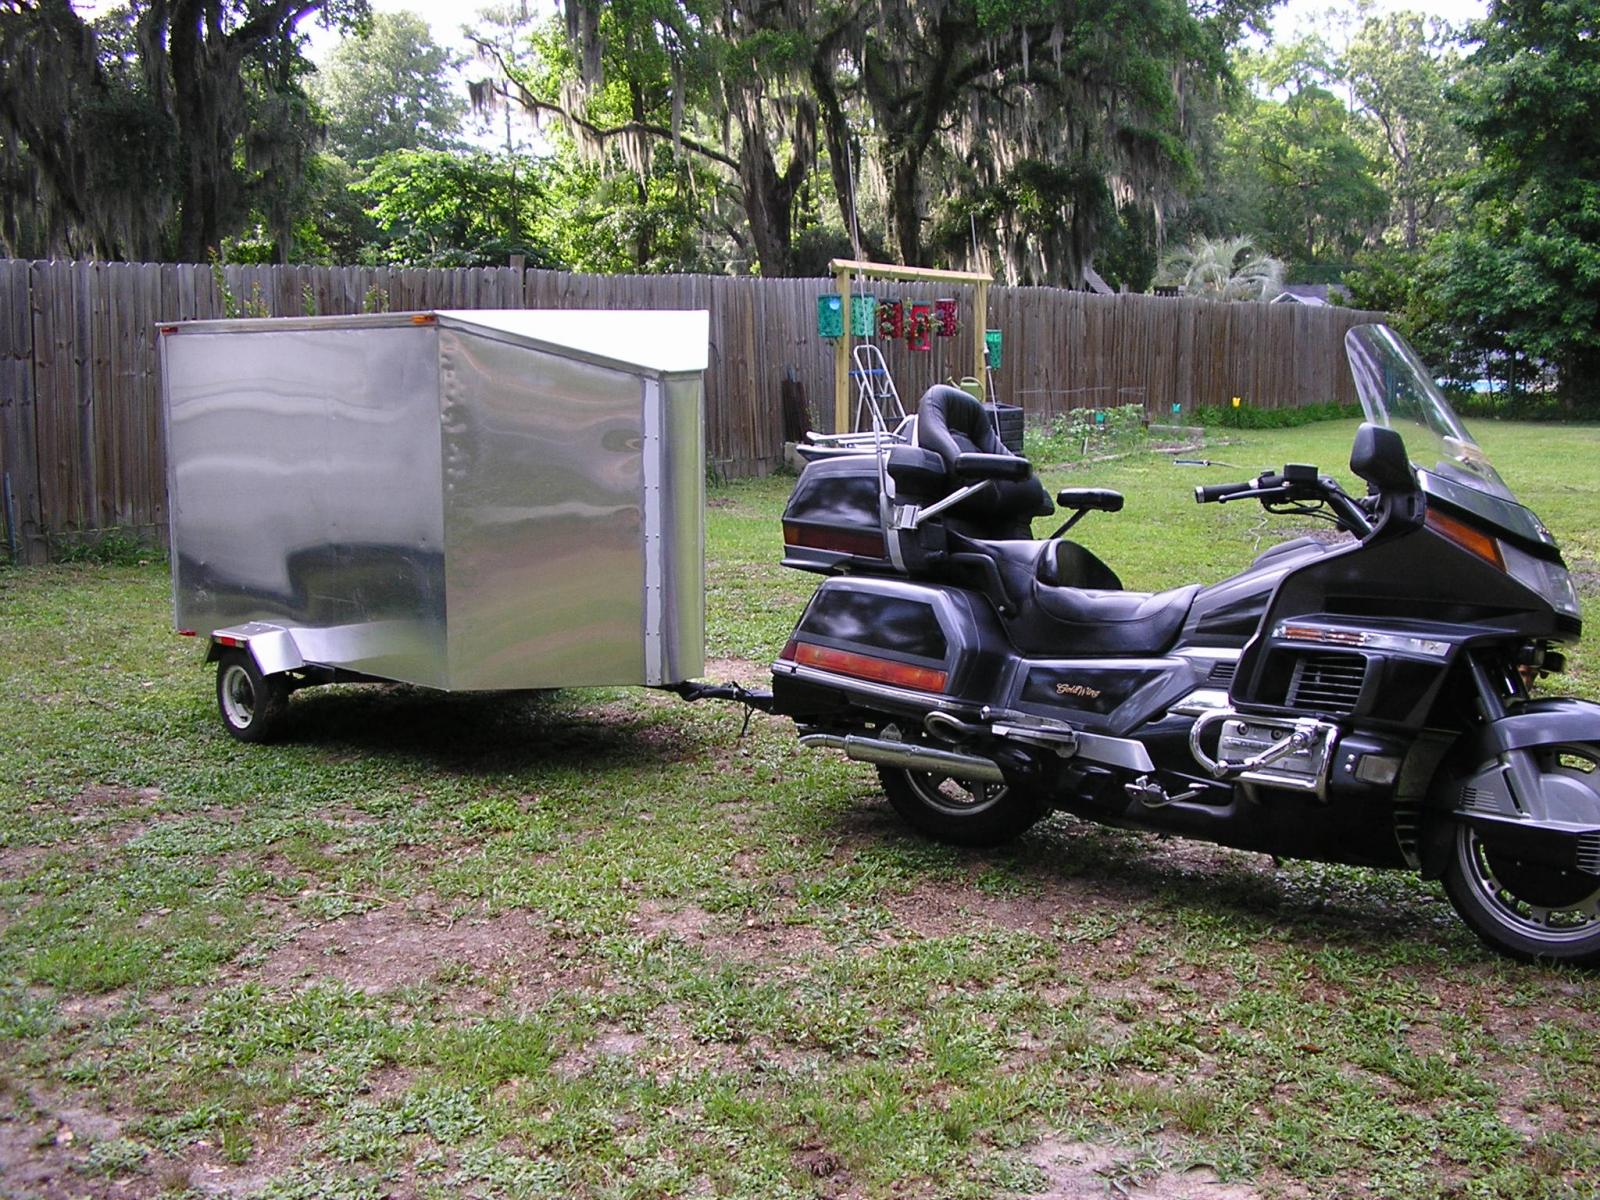
those snaps are going to do the trick, I do suggest you get the primer or at the very lease clean the area with alcohol real good. also if you can ever so carefully use 2000 grit auto sandpaper to buff the spot the snap sits it will improve the bond. We use the VHB tape here all the time and that stuff when applied properly is almost impossible to get loose. I realize it's not apples to apples but the trailer you see behind the bike I built using 2 ATV ramps some metal roofing and VHB tape. I built it in 2016 and it is still together and has not tried to separate at any of the seams. Just saying it's good stuff. take your time . I will say though it does not like cold. so use a hair dryer or heat gun if you have one to warm up the working area as you go. I do like Jan's idea about the Velcro as tugging on the snaps to remove them would be my biggest fear on an older windshield. does your screen have a metal trim around it or is that just rubber or plastic
When I first read you're soldering iron plan my gut reaction was don't do it. Good way to warp the windshield.
Then I thought about it and was like... it might work.
I waffled back and forth for a pretty good time. Eventually I settled on - I wouldn't do it - but I didn't have a solid reason to back that up.
If you are going to do it. Do not push on the soldering iron. Let the heat do the work. Maybe do like FM suggested with the drilling, and put wood with a hole in it behind where you are melting so you can't distort the melt site.
Were it me, I would go with CCjon's velcro suggestion. Be easier to take the top on and off anyway.
You can get replacement windshields for most anything from Gustafsson plastics, they also include a free drill bit with each purchase since the windshields are undrilled. I bought one of these for my Friendship II and it was top notch. They also sell just the drill bit.
https://bikescreen.com/products/california-sidecar-american-spirit-friendship-i-ii
