For some extra information about navigating the forum you can go to Forum Tips
My first hack and built by me
Quote from cleatusj on January 8, 2011, 5:27 pmI was asked over on ADV hacks to post this build over here.
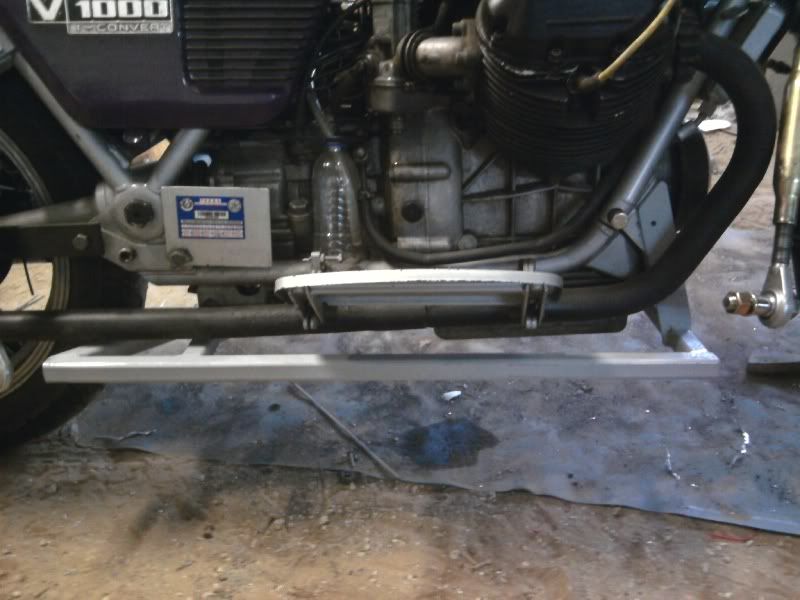
I wanted a way that I could take my wife for a ride in her wheelchair and this will be the answer. I still need to build a nose, the folding ramp and chair tie downs. The only bought parts were top links, bearings and an axle stub.
That's where it stands after building the fender this morning. Soon I need to build the leading link.
I was asked over on ADV hacks to post this build over here.
I wanted a way that I could take my wife for a ride in her wheelchair and this will be the answer. I still need to build a nose, the folding ramp and chair tie downs. The only bought parts were top links, bearings and an axle stub.


That's where it stands after building the fender this morning. Soon I need to build the leading link.
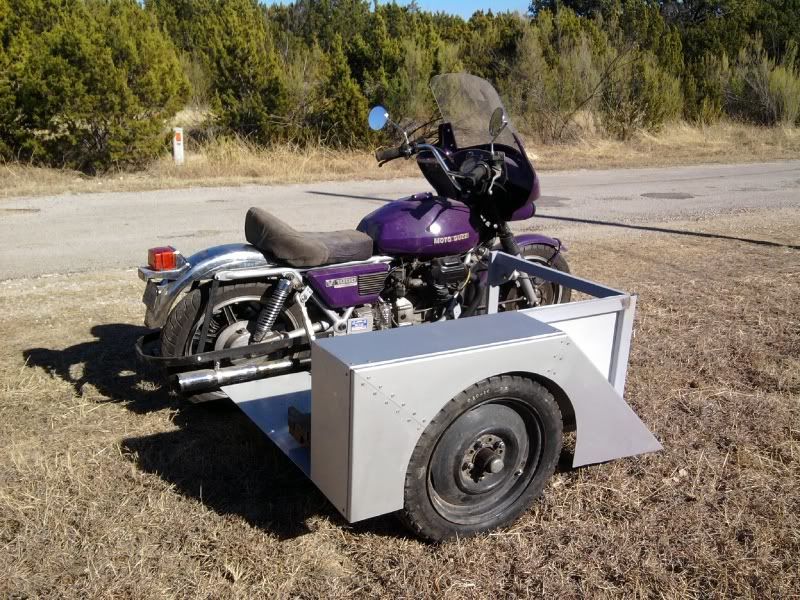
Quote from cleatusj on January 16, 2011, 10:58 amI've been playing with some more sheet aluminum and fabbed this nose cone. This will work for now while I continue to explore other options.

I've been playing with some more sheet aluminum and fabbed this nose cone. This will work for now while I continue to explore other options.

Quote from Deleted user on January 16, 2011, 11:09 amhttp://img.photobucket.com/albums/v320/cleatusj/Photo0076.jpg
Looks good to me. I edit your photobucket need to take off the end parts.
http://img.photobucket.com/albums/v320/cleatusj/Photo0076.jpg
Looks good to me. I edit your photobucket need to take off the end parts.
Quote from SidecarMike on January 16, 2011, 1:05 pmYou are doing a great job. I'm sure she will be very happy.
You are doing a great job. I'm sure she will be very happy.
Quote from gnm109 on January 16, 2011, 1:27 pmThat's very nice work. I see that you have some backgrond in sheet metal work as well. Show more pictures when you get a chance. 🙂
That's very nice work. I see that you have some backgrond in sheet metal work as well. Show more pictures when you get a chance. 🙂
Quote from cleatusj on January 16, 2011, 6:45 pmGNM109, not having a brake available makes for more screws and rivets and less than sharp bends. The nose was bent by clamping between 2 pieces of steel and bending up by hand. the side triangles were done with Wiss hand breaks.
More can be found here. http://www.advrider.com/forums/showthread.php?t=648570
GNM109, not having a brake available makes for more screws and rivets and less than sharp bends. The nose was bent by clamping between 2 pieces of steel and bending up by hand. the side triangles were done with Wiss hand breaks.
More can be found here. http://www.advrider.com/forums/showthread.php?t=648570
Quote from gnm109 on January 16, 2011, 7:29 pmcleatusj - 1/16/2011 3:45 PM
GNM109, not having a brake available makes for more screws and rivets and less than sharp bends. The nose was bent by clamping between 2 pieces of steel and bending up by hand. the side triangles were done with Wiss hand breaks.
More can be found here. http://www.advrider.com/forums/showthread.php?t=648570I looked at the pictures. You are quite handy. I enjoy that sort of fabrication as well but I don't think I'm up to doing a sidecar.
Happy Trails!
cleatusj - 1/16/2011 3:45 PM
GNM109, not having a brake available makes for more screws and rivets and less than sharp bends. The nose was bent by clamping between 2 pieces of steel and bending up by hand. the side triangles were done with Wiss hand breaks.
More can be found here. http://www.advrider.com/forums/showthread.php?t=648570
I looked at the pictures. You are quite handy. I enjoy that sort of fabrication as well but I don't think I'm up to doing a sidecar.
Happy Trails!
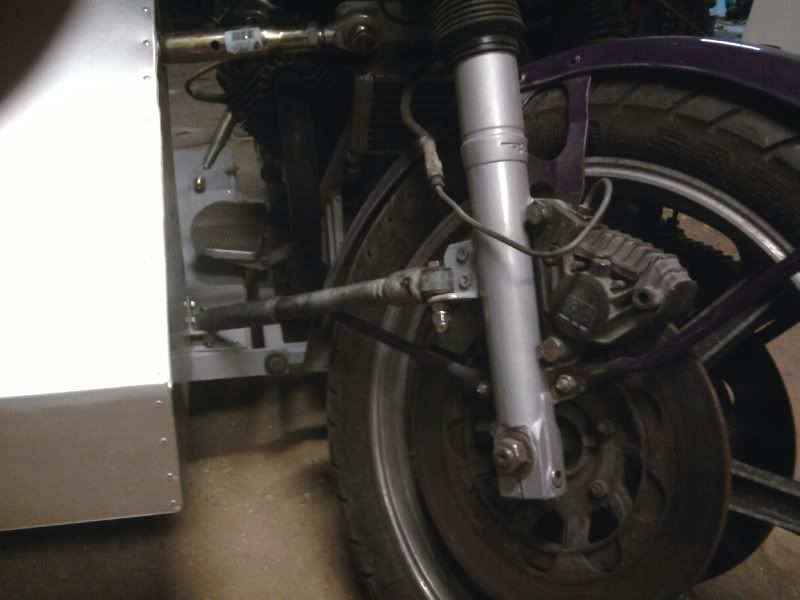
Quote from cleatusj on January 23, 2011, 11:38 pmAdded a Fiearo steering damper that stopped the wobbles even though the only place it would mount to forks was the lower. Took it for a fair ride with out counter weight and all went well except for the 14.5" Sportster shocks bottoming out and riding like a hard tail.
http://img.photobucket.com/albums/v320/cleatusj/Photo0080.jpg
I still plan to build leading links but may add exposed springs to the front forks for the time being. I also picked up a rotor and caliper from a Ford Explorer to use on the sidecar. Just need to redrill to the right bolt pattern.
Added a Fiearo steering damper that stopped the wobbles even though the only place it would mount to forks was the lower. Took it for a fair ride with out counter weight and all went well except for the 14.5" Sportster shocks bottoming out and riding like a hard tail.
http://img.photobucket.com/albums/v320/cleatusj/Photo0080.jpg
I still plan to build leading links but may add exposed springs to the front forks for the time being. I also picked up a rotor and caliper from a Ford Explorer to use on the sidecar. Just need to redrill to the right bolt pattern.
Quote from cleatusj on January 23, 2011, 11:42 pmThis is the only site that Img codes only work sometimes. Is something being turned off?
This is the only site that Img codes only work sometimes. Is something being turned off?
Quote from cleatusj on February 13, 2011, 7:47 pm
 If pic's do not show this time I will forget this site exists. Should be my leading links.
Quote from cleatusj on February 13, 2011, 7:57 pmI'm gone not to return, if you want to find out how the rig is doing, follow link above.
I will hang out in a forum that actually works in a descent manor.
I'm gone not to return, if you want to find out how the rig is doing, follow link above.
I will hang out in a forum that actually works in a descent manor.
Quote from gnm109 on February 13, 2011, 8:36 pmcleatusj - 2/13/2011 4:57 PM
I'm gone not to return, if you want to find out how the rig is doing, follow link above.
I will hang out in a forum that actually works in a descent manor.
To post photos to this site from Photobucket, it's necessary to use HTML. When you open your photo there, you will see four choices:
1. Email and IM
2. Direct Link
3. HTML Code
4. IMG CodeIf you use HTML, your photos should show up......I noticed that some of your photos came up above....
Rather than getting upset and leaving, why not give another try to post your photos? We would like to see them.......
cleatusj - 2/13/2011 4:57 PM
I'm gone not to return, if you want to find out how the rig is doing, follow link above.
I will hang out in a forum that actually works in a descent manor.
To post photos to this site from Photobucket, it's necessary to use HTML. When you open your photo there, you will see four choices:
1. Email and IM
2. Direct Link
3. HTML Code
4. IMG Code
If you use HTML, your photos should show up......I noticed that some of your photos came up above....
Rather than getting upset and leaving, why not give another try to post your photos? We would like to see them.......
Quote from SidecarMike on February 13, 2011, 9:13 pmAt the bottom of the message you were creating there is a box that says disable HTML. It had a checkmark in it. I removed the checkmark for you and the photos appear.
At the bottom of the message you were creating there is a box that says disable HTML. It had a checkmark in it. I removed the checkmark for you and the photos appear.
Quote from cleatusj on February 13, 2011, 10:04 pmI'll try one more time, I came to this site as I was asked to, but it has given me more trouble posting than any of the other 15+ forums I've been a member of.
I'm better at using a torch, hacksaw, angle grinder, drill and welder than taking time to figure out why these different programs work sometimes and others not.
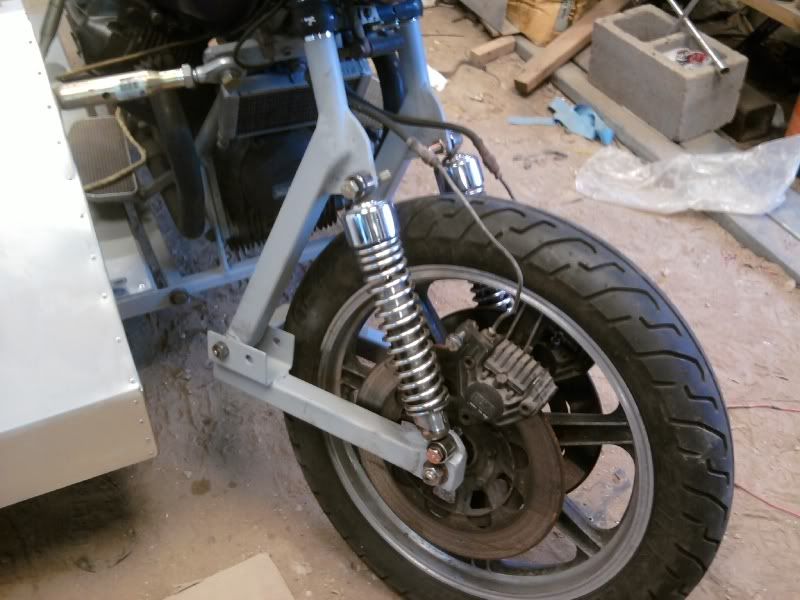
I started with a stock set of tubes and added 1 1/2" sq. tube with .120 wall and used some old 350 honda swing arm bushings on the bottom. I then machined some 1 1/4"x1 3/4" bar stock to fit inside the sq. tube for the swing arm.
I still need to fab the caliper mounts and a fender.
I'll try one more time, I came to this site as I was asked to, but it has given me more trouble posting than any of the other 15+ forums I've been a member of.
I'm better at using a torch, hacksaw, angle grinder, drill and welder than taking time to figure out why these different programs work sometimes and others not.
I started with a stock set of tubes and added 1 1/2" sq. tube with .120 wall and used some old 350 honda swing arm bushings on the bottom. I then machined some 1 1/4"x1 3/4" bar stock to fit inside the sq. tube for the swing arm.


I still need to fab the caliper mounts and a fender.
Quote from SidecarMike on February 13, 2011, 10:14 pmI'm glad you decided to try again. I'm interested in seeing this progress.
Mike
I'm glad you decided to try again. I'm interested in seeing this progress.
Mike
Quote from cleatusj on February 14, 2011, 10:43 pmAcquired a 9/16"x12 die to thread the shortened 350 Honda swing arm bolts. I was able to use the collars and bushings, on the bottom of the tubes, that go with these bolts and will change the grease Zerks.
Acquired a 9/16"x12 die to thread the shortened 350 Honda swing arm bolts. I was able to use the collars and bushings, on the bottom of the tubes, that go with these bolts and will change the grease Zerks.
Quote from cleatusj on February 20, 2011, 7:09 pmI got around to mounting the calipers, damper and a fender.
I then took it out for a 30 mile test run. The spring rate seems about right but will try it with one click of preload next time. I do need to make a 1/8" adjustment to move the calipers out to take pressure off the outside pad.
Other than those small changes I'm real happy with the way it handles.
I got around to mounting the calipers, damper and a fender.


I then took it out for a 30 mile test run. The spring rate seems about right but will try it with one click of preload next time. I do need to make a 1/8" adjustment to move the calipers out to take pressure off the outside pad.
Other than those small changes I'm real happy with the way it handles.
Quote from Peter Pan on February 20, 2011, 9:10 pmKeith , did you put needle bearings into the swing pivots?
that will help you to have less trouble in the future as they avoid wear and slack.
Best wishes
Sven
Keith , did you put needle bearings into the swing pivots?
that will help you to have less trouble in the future as they avoid wear and slack.
Best wishes
Sven